The key to level up quickly in Throne and Liberty is to follow the main quest line of the Adventure Codex. You can do contracts, side quests, dungeons and all the exploration you want, but if you want to level up in the fastest way, don’t deviate from the main quests.
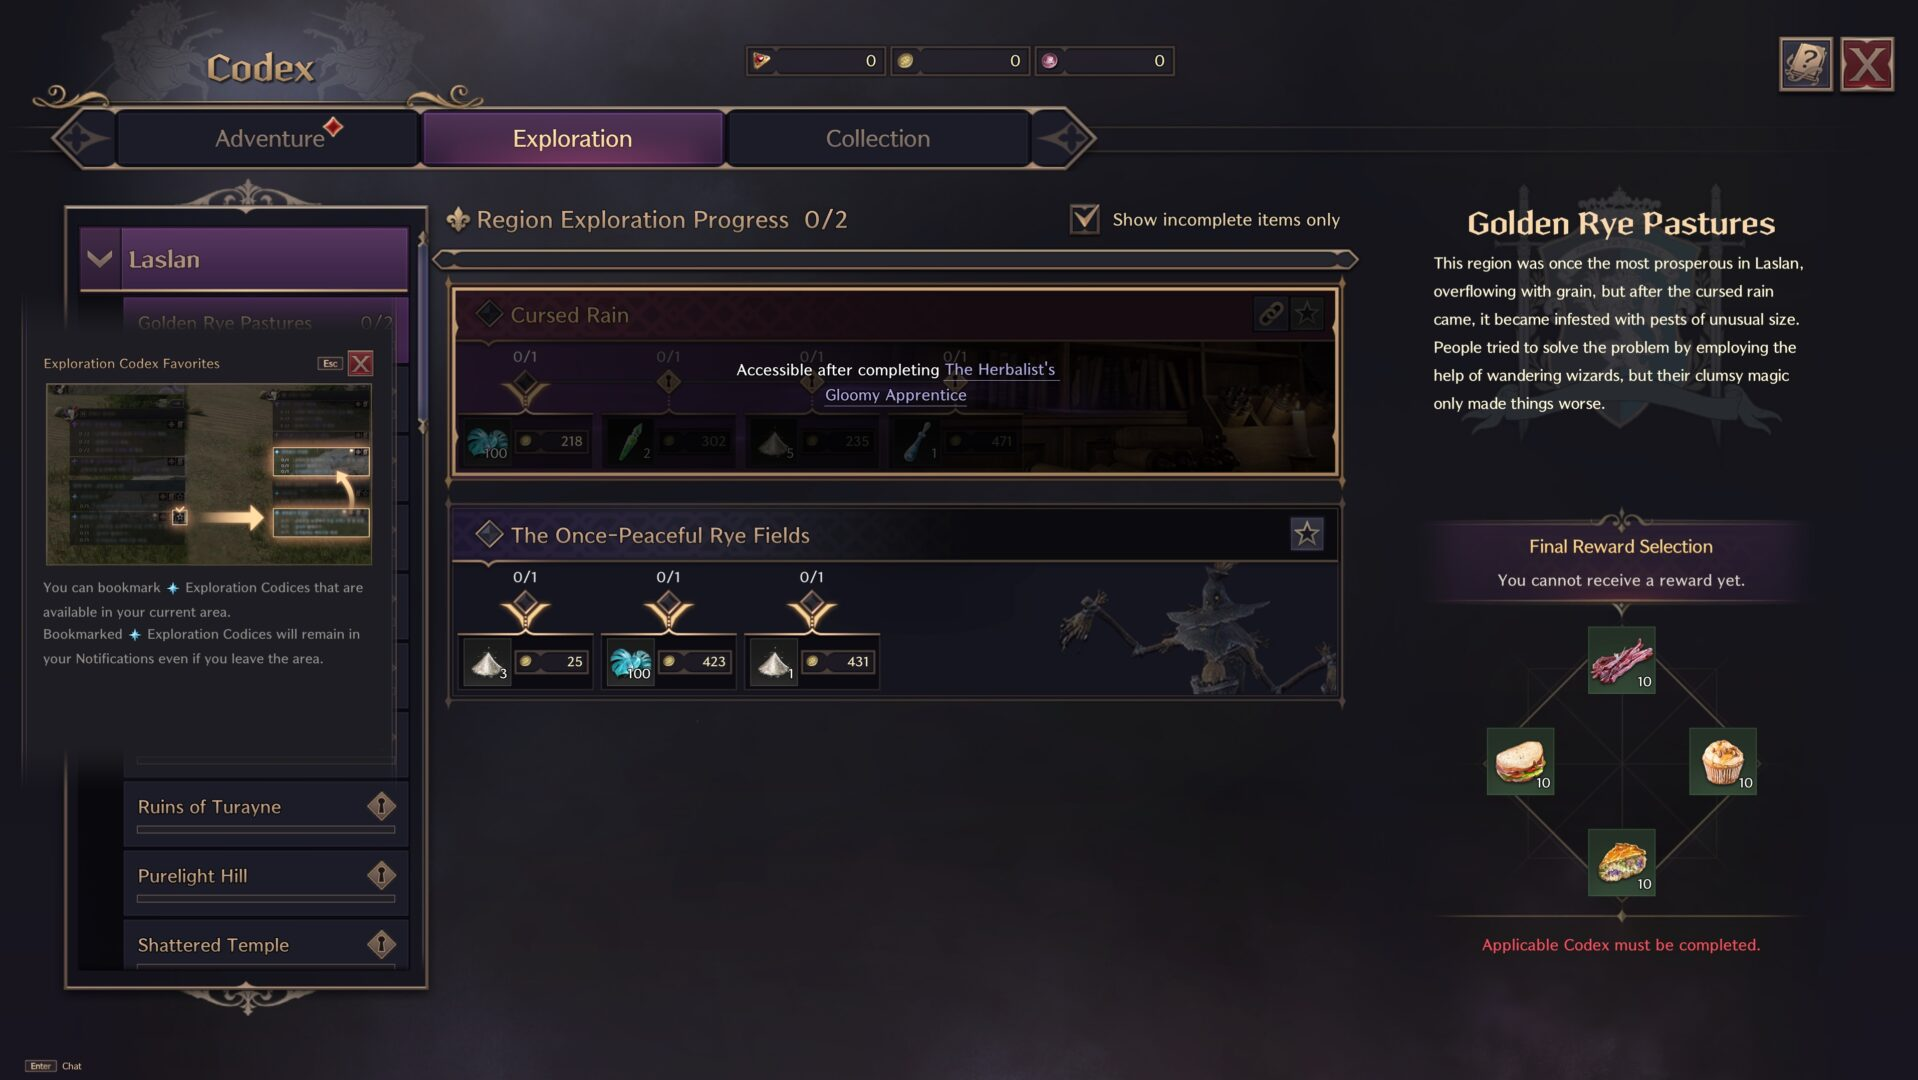
At different progress stages of the Adventure Codex you may find yourself without any new quests, wondering what the hell is going on. What you need in that case is to gain some more EXP and level up. It usually happens between, for example, level 43 and 45, the Adventure Codex will give you quests again when you reach level 45, so you will have to do some extra activities to reach it. You can complete the Exploration Codex quests or participate in dungeons, the important thing is that you reach the necessary level to continue with the quests as soon as possible.
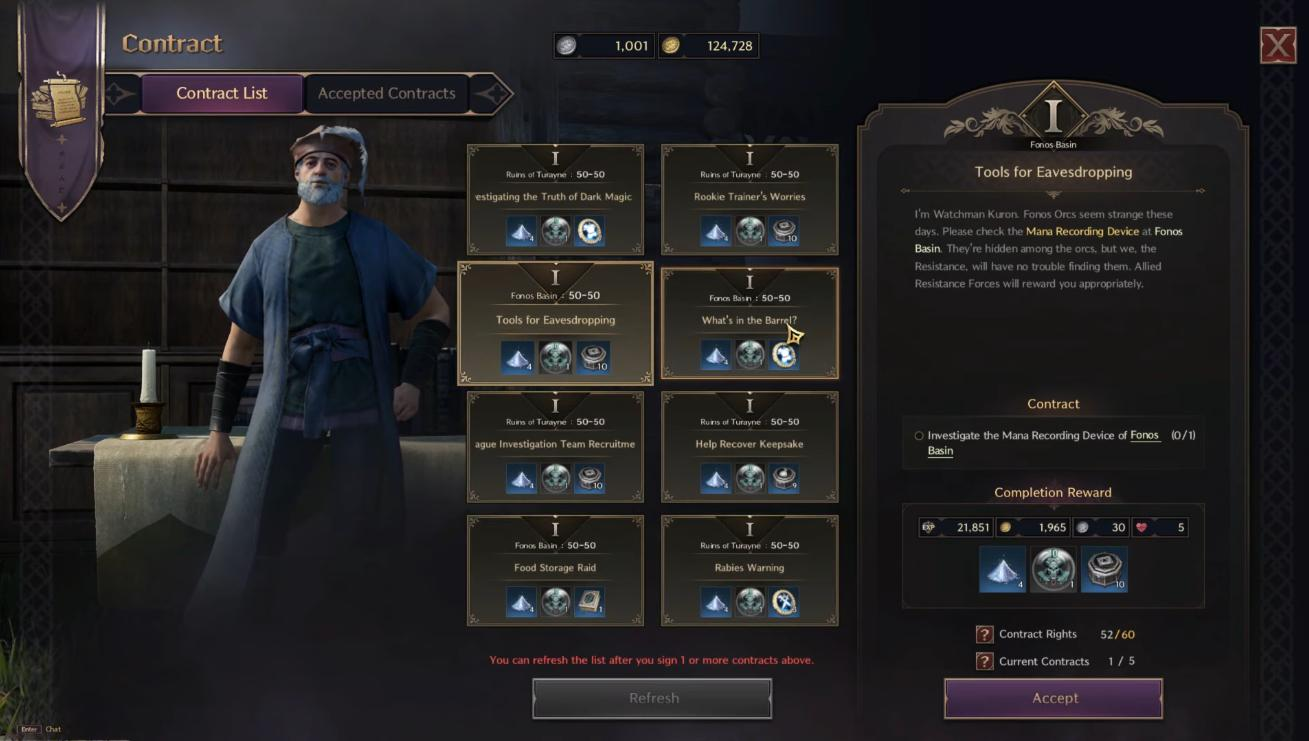
You can also complete Contracts that give you EXP and other useful items, such as Growth Stones. You can complete the contracts as you complete the Adventure Codex, talk to the Contract Manager of the area you are in and accept the contracts in the area. Do not deviate from the Adventure Codex to complete them all, but as you progress you can complete at least some of them without straying from the main goal and get some exp and extra items.
As soon as you get stuck and need to level up to start the new chapter, participate in a dungeon (Taedal’s Tower for example) and complete the Exploration Codex quests of the zones according to the level you are in.
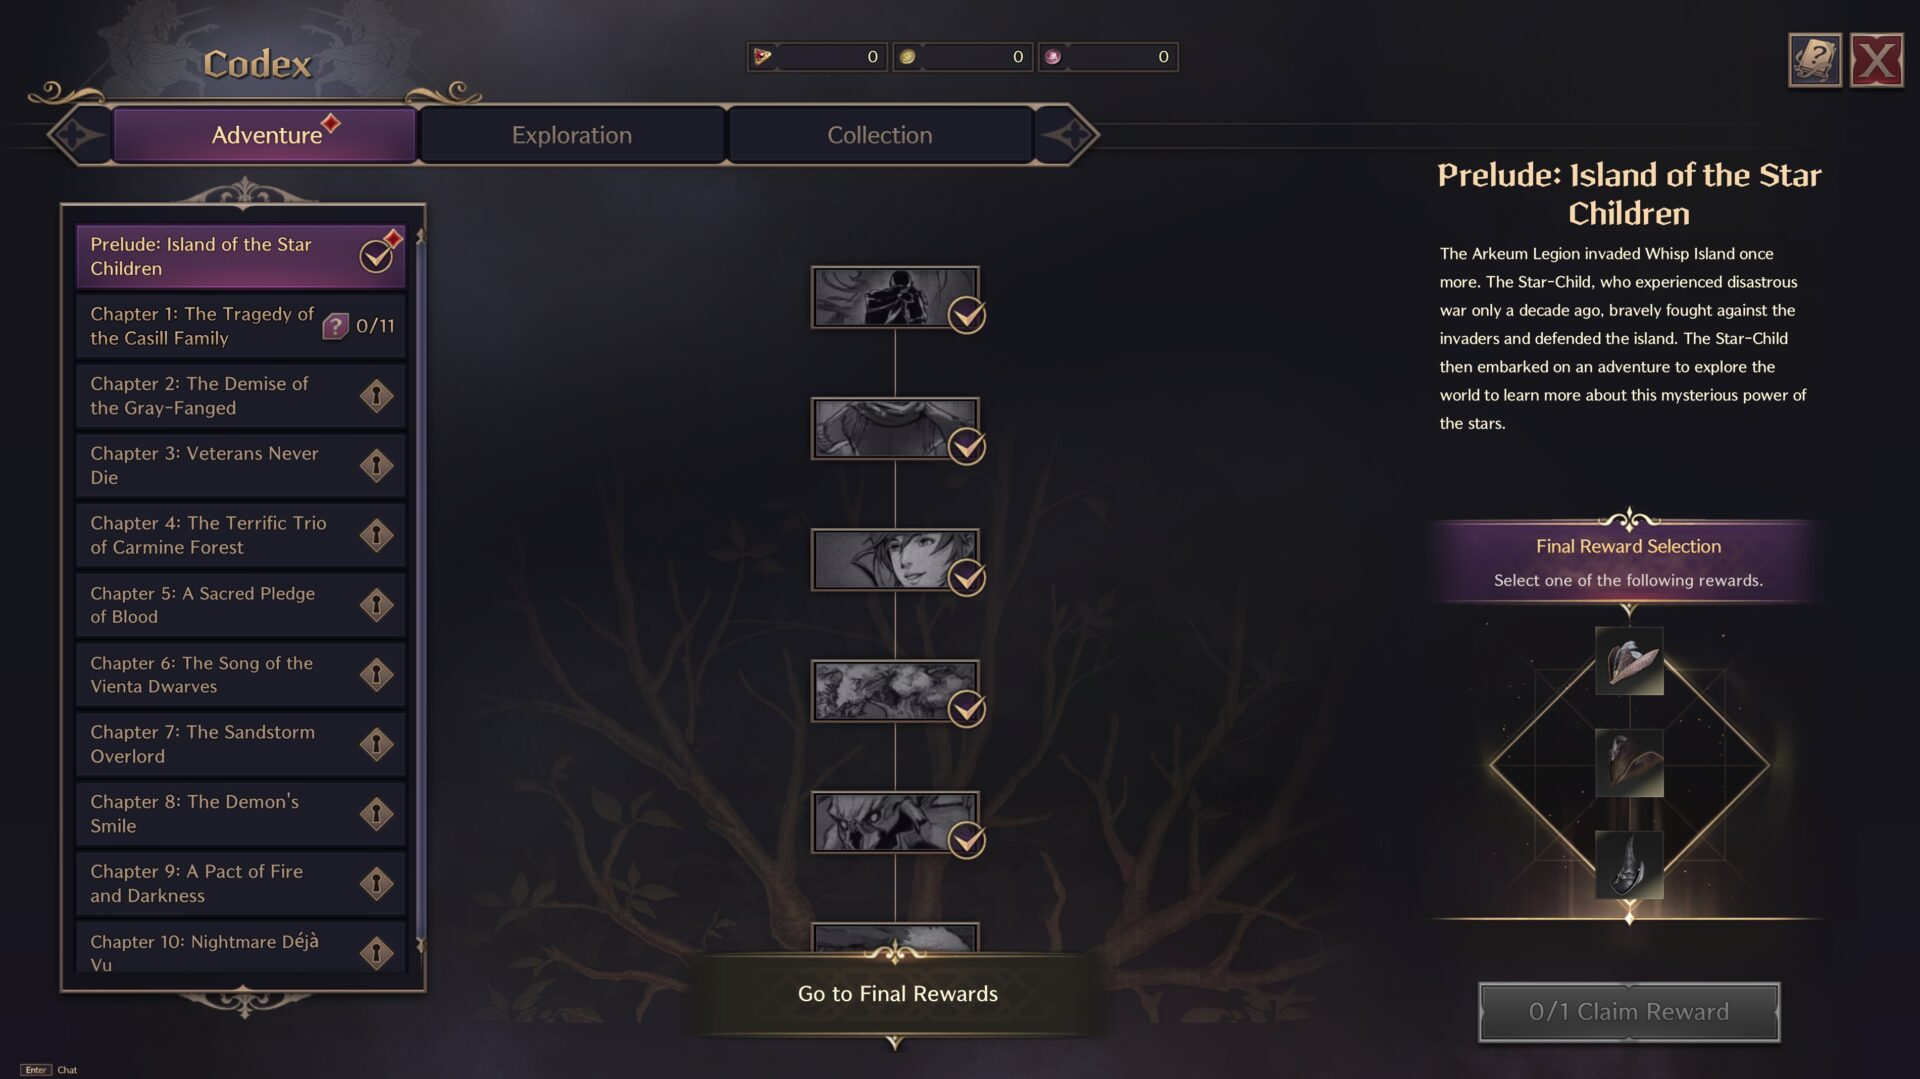
Our recommendation is to stick to the Adventure Codex and complete the chapters. Everything starts with a brief prelude until you get to Kastleton, where it all starts. Stick to the main quests and their appendices, complete the Exploration Codex if you need extra EXP and don’t get distracted by any other quests that don’t give you EXP rewards.
Here are all the chapters and missions of the Adventure Codex, and the parts that can be more complicated. If you are unable to advance for any reason, you can find the information you need below.
Adventure Codex
The Adventure Codex missions are mostly quite simple, but let’s take a look at some details of each chapter for you to keep in mind.
- Chapter 1: The Tragedy of the Casill Family
- Chapter 2: The Demise of the Gray-Fanged
- Chapter 3: Veterans Never Die
- Chapter 4: The Terrific Trio of Carmine Forest
- Chapter 5: A Sacred Pledge of Blood
- Chapter 6: The Song of the Vienta Dwarves
- Chapter 7: The Sandstorm Overlord
- Chapter 8: The Demon’s Smile
- Chapter 9: A Pact of Fire and Darkness
- Chapter 10: Nightmare Déjà Vu
Chapter 1: The Tragedy of the Casill Family
- Find Martinay
- The Locked Infirmary
- Appendix: How to use a Waypoint
- The Herbalist’s Gloomy Apprentice
- Recipe for Rancid Powder
- The Herbalist’s Explanation
- Mana Calming Potion
- Appendix: Developing Weapons
- News from Mina
- Janice’s Advice
- The Records of That Night
Janice’s Advice
During the Janice’s Advice mission you must investigate a book. To get the key, place the pointer on the flower on the cover of the book and hold the left click and then the right click, the book will open and repeat the same on the key.
Chapter 2: The Demise of the Gray-Fanged
Required Level: 7
- The Lord’s Aide’s Crisis
- Appendix: Weapons Transfer
- Appendix: Armor Crafter Rachel
- Appendix: How to Craft Armor
- Appendix: Improving Armor Performance
- Shipwreck Pincers
- The Relieved Aide
- Appendix: A Mutually Beneficial Meeting
- Chris, Head of the Wolf Hunters Association
- Appendix: The Hero of the Wolf Hunting Contest
- Appendix: A Father’s Heart
- The Mystical Tomb of Hamel
- Proof of Valor
- The Help of a Likable Artisan
- Appendix: Developing Skills
- Appendix: The Importance of Skill Development
- A Girl’s Gratitude
- At Henry’s Grave
- A Hero’s Last Fight
- A Sincere, Warm Embrace
Nothing complicated here, just remember to complete the Appendix.
Chapter 3: Veterans Never Die
Required Level: 12
- Resistance Contracts
- Resistance Contract Coin
- Appendix: Accessories Crafter Marianne
- Appendix: Accessories Crafting
- Appendix: Upgrading Accessoires
- At the Starlight Observatory Ruins
- The Lakeside Watch Captain
- Defeat the Goblin Shaman
- Acquiring the Shaman’s Chest
- Watch Captain’s Promise
- Goblin’s Advice
- An Encounter
- Retrieve the Scattered Instructions
- Decipher the Goblin Orders
- Guard the Starlight Observatory Ruins
- A True Captain
- Appendix: Lucky Day
- Appendix: Mystic Globes and Mystic Portals
- Appendix: Ashien’s Strange Painting
- A Night Ten Years Ago
Resistance Contracts
The first mission of chapter 3, Resistance Contracts, will ask you to accept and complete 4 contracts from Contract Manager Noss in Kastleton. We recommend you to complete the contracts that reward you with Quality Lithograph: Armor and Quality Lithograph: Accessories (this will help you to complete an Appendix Quest that requires you to have 4 extra Green Accessories).
Guard the Starlight Observatory Ruins
In this quest you will again have to investigate an object, Gnoller’s Staff. Click on the cloth coming out of the mouth and the jaw will open, then click on the object inside the mouth and then click on the inscription on the inside of the mouth.
Appendix: Ashien’s Strange Painting
This quest will take you for the first time to Taedal’s Tower, a single-player boss rush dungeon. As its name suggests, it’s a tower, in which you’ll face special challenges on each floor. To finish this quest, you need only to complete the first floor.
Chapter 4: The Terrific Trio of Carmine Forest
Required Level: 18
- Rutaine, the Genius Wizard
- Retrieve the Mana Recording Devices
- Results of the Analysis
- Robert, the Wind Ranger
- Examine the Destroyed Carriages
- Investigate Chief Terror Bird Nest
- The Terrific Trio’s Leader, Sophia
- The Children’s Whereabouts
- Rescue Operation
- Resistance’s New Hope
- Appendix: The Abyssal Contract
- The Terrific Trio’s Pledge
- Appendix: Mysterious Lithograph Book
- Appendix: A Place for Guilds
- Appendix: Dimensional Circle Researcher Paola
You will not find any difficulty in these quests. Just keep in mind that after completing Chapter 4 you should have completed your Green Gear and that to continue with Chapter 5 you need to be level 23.
If you finished Chapter 4 and you still haven’t reached level 23 you will have to do some extra activities. You can try to complete the 2nd floor of Taedal’s Tower, complete contracts and Exploration Codex Quests in Vienta Village, we recommend you to go to Monolith Wastelands south of Vienta Village and complete the Exploration Codex Quests in the area. When you reach level 23 continue with Chapter 5.
Chapter 5: A Sacred Pledge of Blood
Required Level: 23
- The Contaminated Belongings
- The Vienta Village Clinic
- Night at the Clinic
- News Spreads Fast
- Appendix: The Romance of Fishing
- Appendix: The World of Cooking
- Blood Ritual
- His Name Is Jacque Hander
- Pledge Loop
- Ezekiel and Leonardas
- Appendix: The Guardian and the Guardian’s Pledge
Ezekiel and Leonardas
In this quest you will find a small puzzle, you can see how to complete it in the following video.
After finishing all the Codex quests you probably haven’t reached level 28 yet. In that case you can return to Taedal’s Tower and complete more floors and complete the Exploration Codex quests. For level 26-27 we recommend you to go to the regions Monolith Wastelands and Abandoned Stonemason Town, complete the Exploration Codex quests in the area until you reach level 28 to continue with Chapter 6.
Chapter 6: The Song of the Vienta Dwarves
Required Level: 28
- Resistance Intel Officer’s Advice
- Encounter with Henderson Harmon
- Meeting Cavane
- Find the Desert Materials
- Stolen Silk Scarf
- Retrieve the Bandits’ Stolen Items
- Return of a Masterpiece
- Find Golem’s Heart Fragment 1
- Find Golem’s Heart Fragment 2
- Restoring the Heart
- Contents of the Old Bag
- The Song of the Vienta Dwarves
- Heroes of Stonegard
Restoring the Heart
In this quest you will again have to investigate an object, Golem’s Heart. Turn the rocks and click on the fragment with 3 gems, then on the one with 2 gems and finally on the one with one gem.
For the next Chapter you need to be level 32, if you haven’t reached it yet go back to Taedal’s Tower and go up some more floors and complete the Exploration Codex quests of your level, for level 30-31 we recommend you go to Abandoned Stonemason Town and Moonlight Desert until level 32 is reached.
Chapter 7: The Sandstorm Overlord
Required Level: 32
- Sandworm Lair Phantom
- Queen Bellandir’s Tracks
- Why You Must Carry On
- If She Cannot be Stopped…
- Moonlight Oasis Wizard
- Magic Amplification Gear Materials
- Luring Device Mana Source
- Appendix ▶ Clay’s Book
- Unexpected Variable
- Water for Drawing Magic Schema
- Sand for Engraving Magic Schema
- Queen Bellandir Luring Device
- Marcia’s Request
- Support the Sandworm Raid Group
- Marcia’s Plans
- Prepared Trap
- Operation: Defeat Queen Bellandir
- Dream Near Fulfillment
- Victim’s Stone
- Appendix ▶ Marcia’s Picture
- Appendix ▶ The True Feelings of Two Siblings
- Miracle in the Sandstorm
While completing the quests in this chapter also complete the Exploration Codex quests in Sandworm Lair, as you will need the extra exp.
Queen Bellandir Luring Device
In this quest you will again have to investigate an object, Queen Bellandir Luring Device. Click first on the ring coming out of the cylinder. Then one of the ends will open, click there. Finally the cylinder opens and you must click on the object hidden inside.
At the end of Chapter 7 you are probably level 36 or 37, you need to reach level 38 to start Chapter 8. Go back to Taedal’s Tower and go up a few more floors and go to Daybreak Shore and The Raging Wilds. Complete the Exploration Codex quests there until you reach level 38.
Chapter 8: The Demon’s Smile
Required Level: 38
- Wasteland Abnormality
- The Ominous Rift
- Traces around the Tower
- Atop the Abandoned Tower
- Prompt Warning
- Old Poem
- The Snake Tongue Flower
- Incense to Identify Demons
- Lukas’s Identity
- Havres’s Journals
- The Truth About Elleia
- Story of That Day
- Appendix ▶ Ollis’s Request
While completing the quests in this Chapter also complete the Exploration Codex quests of The Raging Wilds, as you will need the extra exp.
Lukas’s Identity – Havres Boss Battle
It won’t be difficult to face Havres, it’s only worth mentioning that in a moment the boss will become invulnerable to damage. To break the invulnerability get close to the heart that is released from one of the pillars until Havres launches his lightning attack, when he does it if you are close enough to the heart, it will take damage and break, ending his invulnerability.
The Truth About Elleia – Risieth Boss Battle
The battle is quite simple, just keep in mind that Risieth will summon copies of herself, you can distinguish the real Boss by the debuffs you have inflicted on her before the copies appear. You will also see that with one attack Risieth will set you on fire, taking constant damage. To extinguish the fire use the water puddles.
Most likely you will finish Chapter 8 with level 43, to reach level 45 you can go back to Taedal Tower and go up a few more floors and complete the Exploration Codex quests at Manawastes. If you still need more experience, you can start with the Exploration Codex quests of Akidu Valley.
Chapter 9: A Pact of Fire and Darknes
Required Level: 45
- Reunion
- Dangerous Companion
- Unknown Threat
- Investigation in the Flames
- Missing Friend
- Benny’s Trail
- Undercover Investigation
- Find Benny
- Secrets of the Valley
- Dark Wizard
- Talon Guild Conspiracy
- Escaping the Valley
- Find Evidence
- Conspiracy Revealed
- Flame Consumed by Darkness
Escaping the Valley
In this quest you will again have to investigate an object, Blue Relic.
Chapter 10: Nightmare Déjà Vu
Required Level: 48
- Gift of Motherly Love
- Into the Grayclaw Forest
- Find Harden
- Appendix ▶ Vicious Lycans
- Find Harden
- Harden’s Tracks
- At the Lycans’ Hall
- Guild Base in Chaos
- Material to regain consciousness
- Purified Mitran’s Spirit
- Awoken Harden
- Clay’s Magic Communication Device
- Investigate the Ruins of Turayne
- Pitch Black Energy
- Appendix ▶ Crumbling Industrial City
- Dark Nightmare
- Study on Stars and Nightmares
- Assaulted Purelight Tower
- Rescue Gigantrite
- Assemble
- Nightmare Herald
- Into Another Dark Nightmare
- Encounter with the Giant Star
- Clay’s Trail
- Appendix ▶ Mother and Son’s Hearts
Nightmare Herald
You need to stay hidden to finish this quest. Above your character you will see an eye that will indicate if you are discovered or not, if it is closed you are doing well, if it opens you will be seen. Stay in the shadows and away from the enemies. Below you have a video for the path you can take.


