Taedal’s Tower 11th Floor: Maze of Death

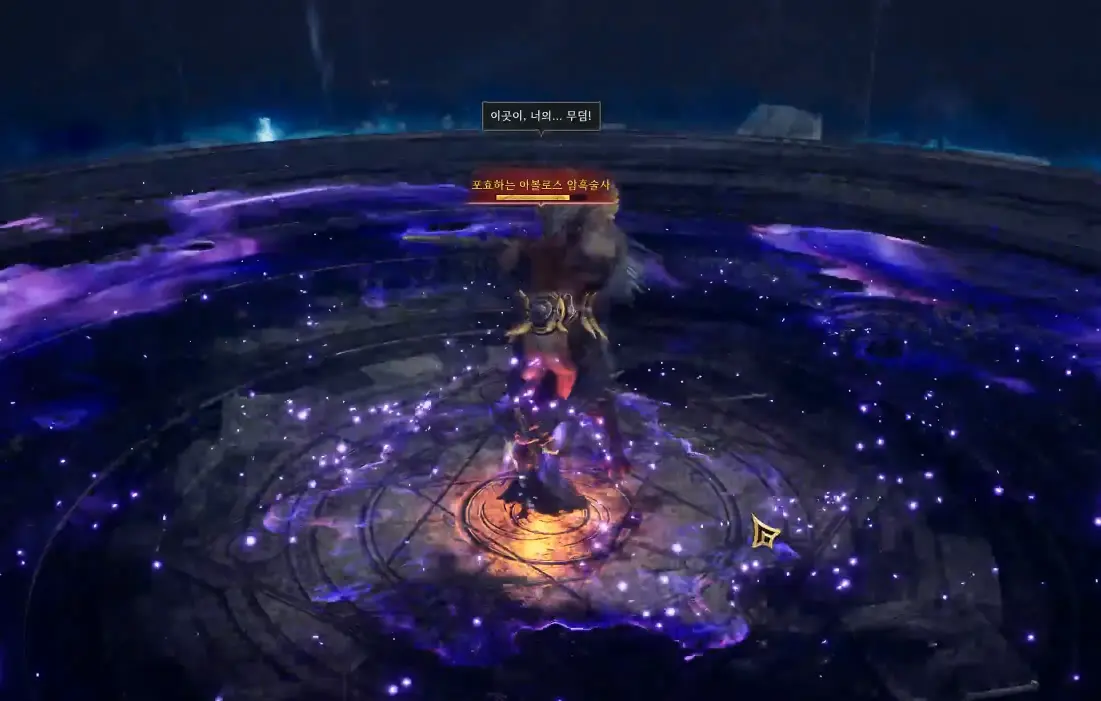
In this guide we tell you everything you need to know to complete the 11th floor of the Secret Dungeon Taedal’s Tower: Maze of Death. Defeat the boss Roaring Avolos Umbramancer to continue to the next floor.

To access the 11th floor of Taedal’s Tower you must first complete the 10th floor: Commander’s Shadow Strike, check out this guide for more details.

Still not sure what Taedal’s Tower is all about or how to get in? Don’t worry, find out everything you need to know about the Taedal Tower at this link: What is and How to Enter Taedal’s Tower Dungeon

Taedal’s Tower 11th Floor: Maze of Death

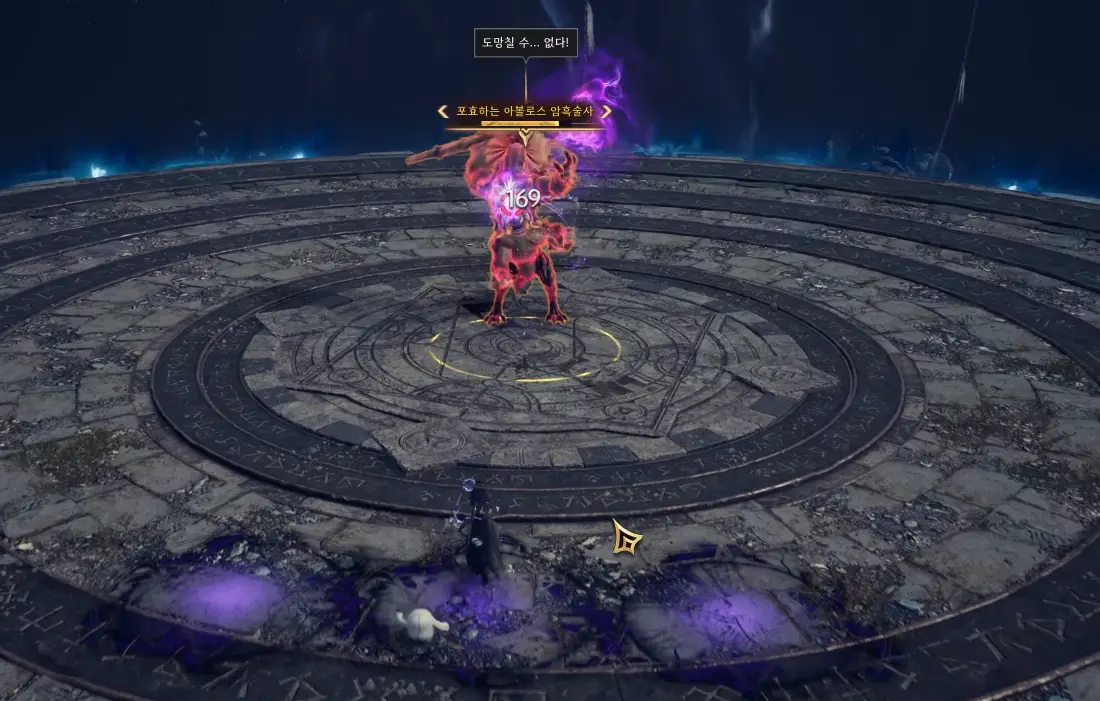
Roaring Avolos Umbramancer Strategy
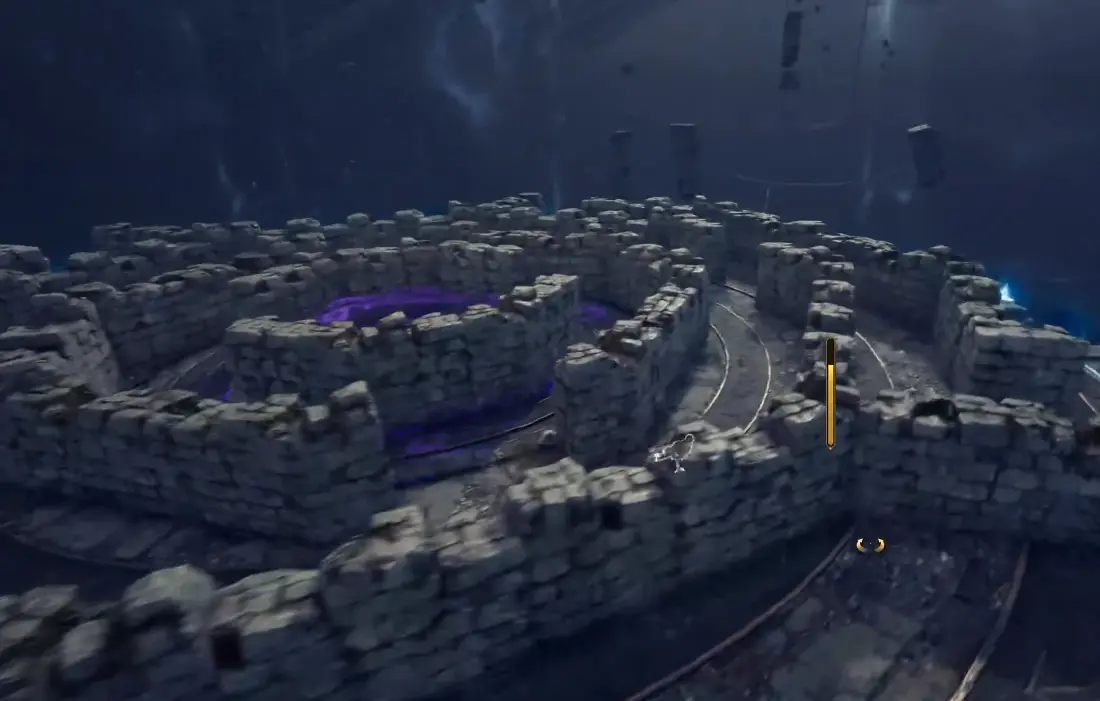
Maze of Death

The boss pulls you towards the center of the arena, you will not be able to avoid this attack, and it will create a maze around it. You must quickly escape the maze to avoid the dark energy that advances from the center. You can not climb the walls, you can only get out by walking through the corridors.

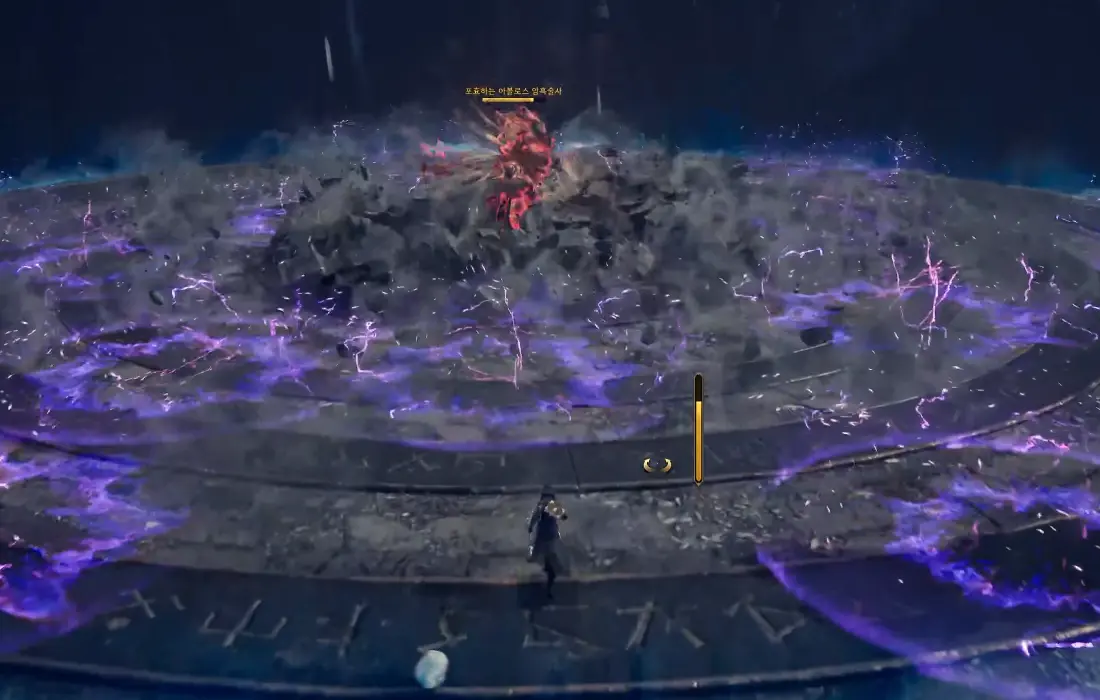
When the walls of the maze fall down you will see circles appear on the ground. Avoid them as they will be hit by a series of lightning bolts.
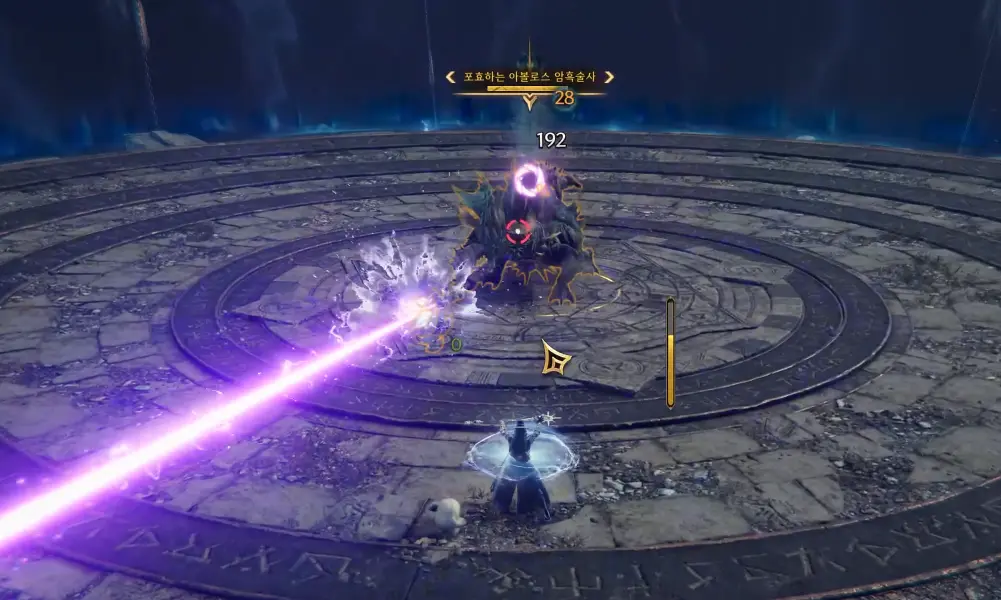
Light Beam

The boss will launch a beam forward. Always move to the sides of the boss to avoid it.
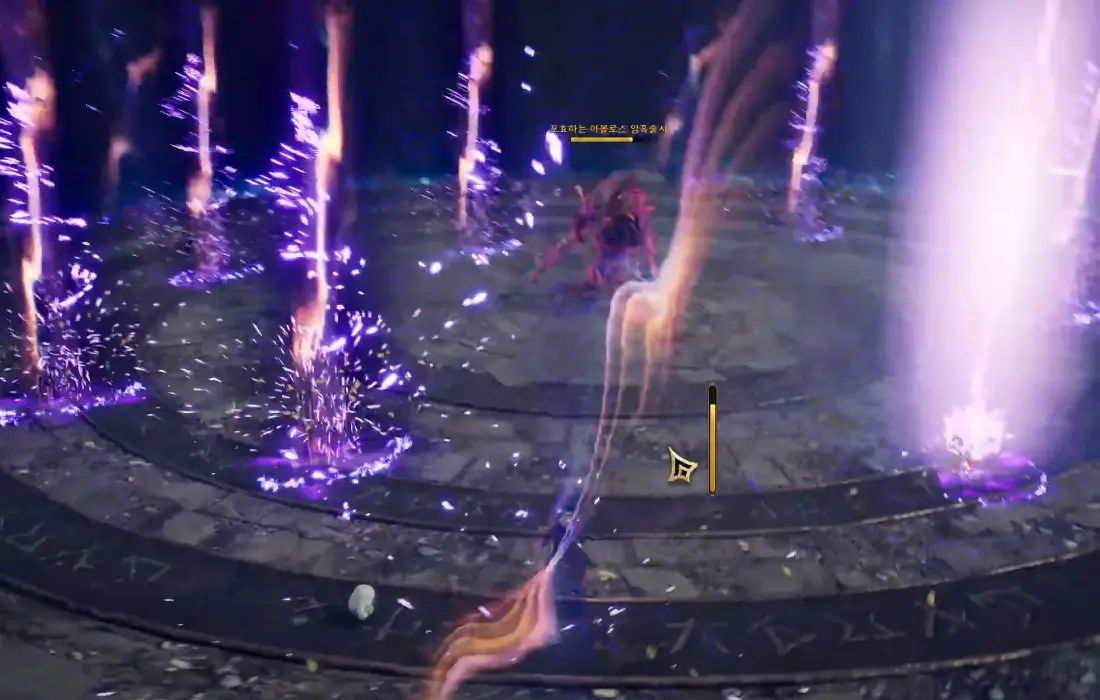
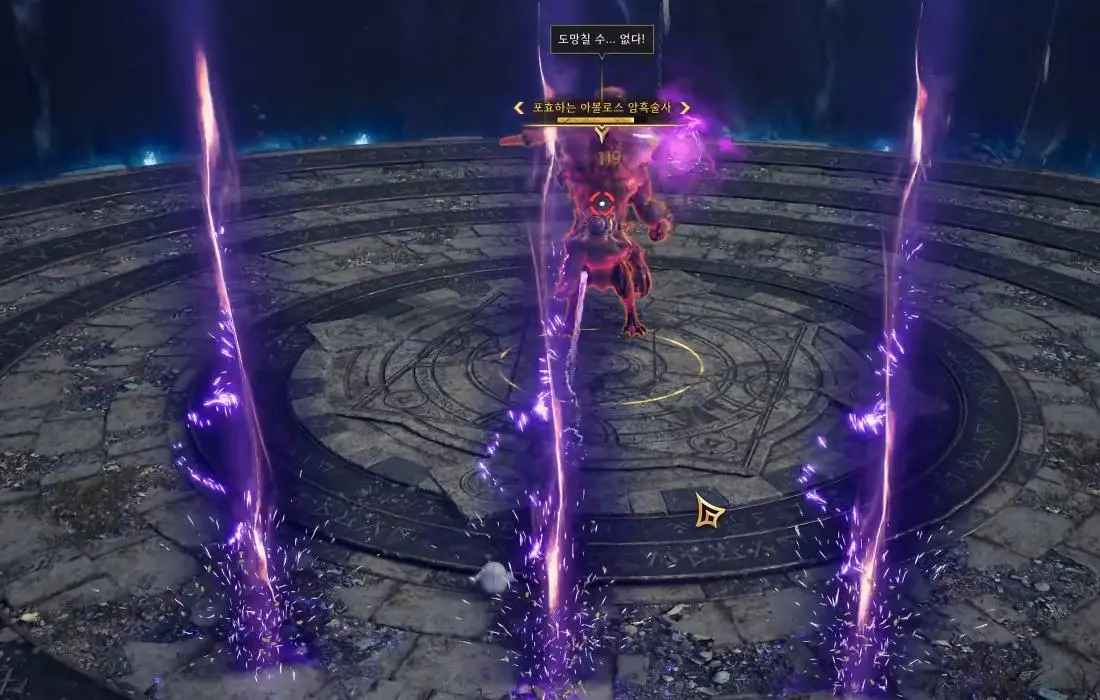
Lightning Strike

On the ground you will see three circles appear, move quickly because each one will receive a lightning strike. This attack can happen twice in a row. When the boss’s HP drops below half, up to 6 circles can appear at once.

Rewards

  • Rare Weapon Growthstone x2
  • Rare Armor Growthstone x4
  • Rare Accessory Growthstone x2
  • Quality Recovery Crystal x5
  • 14889 Coins
  • 21850 EXP

Community

InteractiveMap.App

Throne and Liberty Interactive Map

How to complete Demon's Test: Junobote's Examination Paper
Guides

How to complete Demon’s Test: Junobote’s Examination Paper

Complete Demon's Test: Junobote's Examination Paper to get Kamarshea Guardian's Pledge First you must find Junobote's Examination Paper in Manawastes to activate the Exploration Codex:...
Taedal’s Tower 20th Floor: Revenge and Resurrection
Guides

Taedal’s Tower 20th Floor: Revenge and Resurrection

In this guide we tell you everything you need to know to complete the 20th floor of the Secret Dungeon Taedal's Tower: Revenge and...
Taedal’s Tower 19th Floor: Reaching for Higher
Guides

Taedal’s Tower 19th Floor: Reaching for Higher

In this guide we tell you everything you need to know to complete the 19th floor of the Secret Dungeon Taedal's Tower: Reaching for...
Taedal’s Tower 18th Floor: Swirling Firestorm
Guides

Taedal’s Tower 18th Floor: Swirling Firestorm

In this guide we tell you everything you need to know to complete the 18th floor of the Secret Dungeon Taedal's Tower: Swirling Firestorm....
Taedal’s Tower 17th Floor: Unbreakable Shield of Cooperation
Guides

Taedal’s Tower 17th Floor: Unbreakable Shield of Cooperation

In this guide we tell you everything you need to know to complete the 17th floor of the Secret Dungeon Taedal's Tower: Unbreakable Shield...
Taedal’s Tower 16th Floor: Precise Moment
Guides

Taedal’s Tower 16th Floor: Precise Moment

In this guide we tell you everything you need to know to complete the 16th floor of the Secret Dungeon Taedal's Tower: Precise Moment....
Taedal’s Tower 15th Floor: Stealers and Retrievers
Guides

Taedal’s Tower 15th Floor: Stealers and Retrievers

In this guide we tell you everything you need to know to complete the 15th floor of the Secret Dungeon Taedal's Tower: Stealers and...
Taedal’s Tower 14th Floor: Out of Sight
Guides

Taedal’s Tower 14th Floor: Out of Sight

In this guide we tell you everything you need to know to complete the 14th floor of the Secret Dungeon Out of Sight. Defeat...