Taedal’s Tower 18th Floor: Swirling Firestorm

In this guide we tell you everything you need to know to complete the 18th floor of the Secret Dungeon Taedal’s Tower: Swirling Firestorm. Defeat the boss Exploding Flame Desert Wizard to continue to the next floor.

To access the 18th floor of Taedal’s Tower you must first complete the 17th floor: Unbreakable Shield of Cooperation, check out this guide for more details.

Still not sure what Taedal’s Tower is all about or how to get in? Don’t worry, find out everything you need to know about the Taedal Tower at this link: What is and How to Enter Taedal’s Tower Dungeon

Taedal’s Tower 18th Floor: Swirling Firestorm

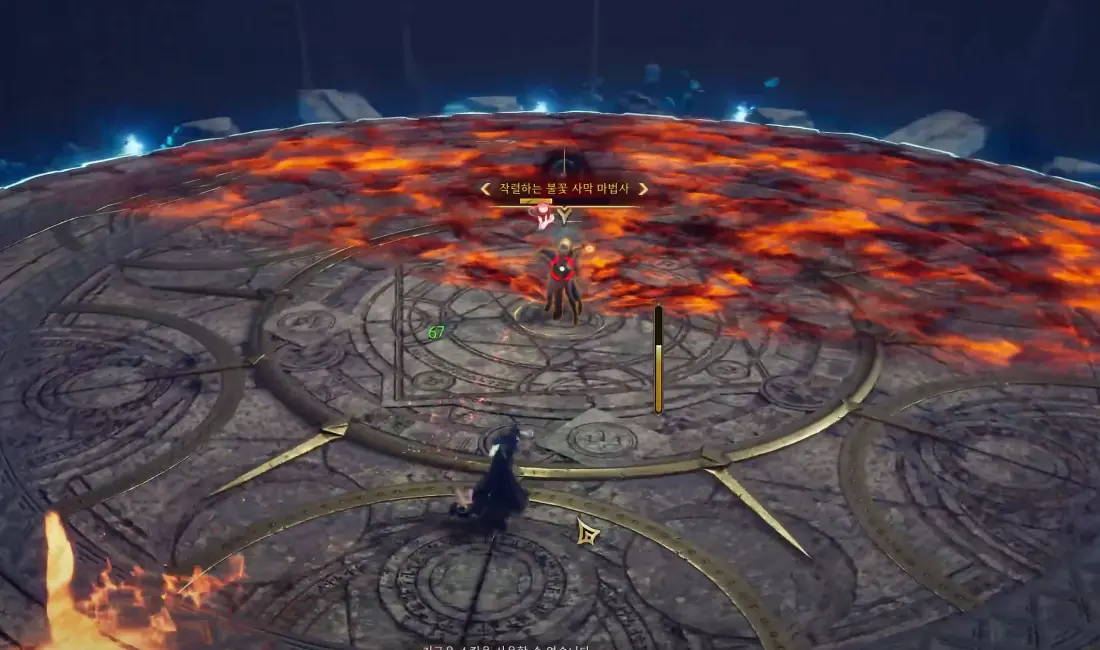
Exploding Flame Desert Wizard Strategy

Flamethrower

The boss jumps backwards and then launches an explosion of flames forward in a fan-shaped area twice in a row. When you see it jump backwards, hurry to position yourself behind the boss to avoid taking damage.
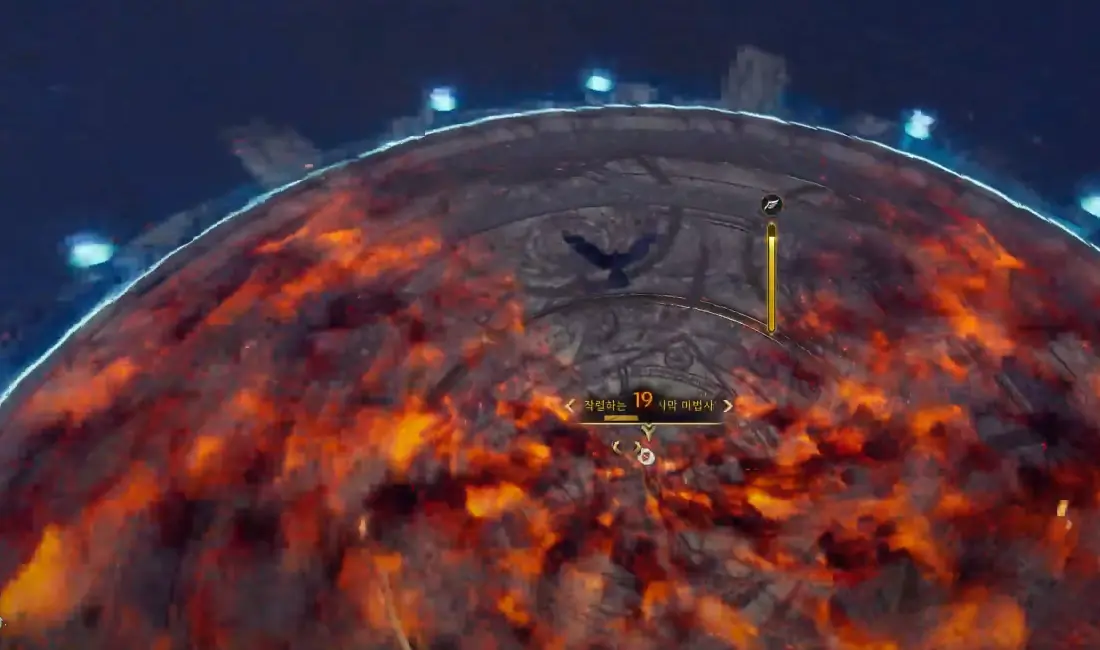
Firestorm

Exploding Flame Desert Wizard teleports to the center of the arena and summons a whirlpool that will make the small fire whirlpool that runs through the arena become bigger. When the fire whirlpool grows use it to lift you up and use your morph to glide as the boss sets the arena on fire with his attack.

From the air you will see a small portion of the arena become free of the fire, you can drop down there and continue the battle. The area affected by the boss’s ability will decrease until it is completely over.

Rewards

  • Rare Weapon Growthstone x4
  • Rare Armor Growthstone x8
  • Rare Accessory Growthstone x6
  • Quality Recovery Crystal x10
  • 24364 Coins
  • 35755 EXP

Community

InteractiveMap.App

Throne and Liberty Interactive Map

Dungeons

Throne and Liberty: Molgras and Murdock Dungeon

This guide will walk you through one of the first solo dungeons, also known as Halls of Illusion. These dungeons offer unique bosses and...
Dungeons

Throne and Liberty: Chapel of Madness Dungeon Guide

Overview of Chapel of Madness Chapel of Madness is a 3-Star Dimensional Circle Dungeon in Throne and Liberty (TL). Players must battle Grayeye, a powerful...
Dungeons

Throne and Liberty: Complete Guide to Limuny Bercant & Halls of...

Limuny Bercant Overview Limuny Bercant is a powerful undead boss in Throne and Liberty (TL), found within the Halls of Tragedy Dungeon. She possesses deadly...
Dungeons

Throne and Liberty – Rancorwood Dungeon Guide: How to Defeat King...

Rancorwood is a 3-Star Dimensional Circle dungeon in Throne and Liberty (TL) where players must face King Khanzaizin. This guide provides an overview of...
Throne and Liberty: Rune Synergy Bonuses
Guides

Throne and Liberty: Rune Synergy Bonuses

Weapon Rune Synergy Bonuses RaritySynergy BonusCommon- Strength 2- Dexterity 2- Wisdom 2- Perception 2- Bonus Damage 6- Damage Reduction 6Uncommon- Strength 2- Critical Hit Damage...
Throne and Liberty: How to get Bait
Guides

Throne and Liberty: How to get Bait

To fish in Throne and Liberty you will need bait. In this guide we tell you what it is for and how to get...
Throne and Liberty: Fortitude Stat
Guides

Throne and Liberty: Fortitude Stat

What is Fortitude? Fortitude stat aims to improve your survivability, boost your endurance, your base damage and enhances your crowd control resistance. Let's take...
Throne and Liberty: How to get Vitalstones
Guides

Throne and Liberty: How to get Vitalstones

In this short guide we tell you what Vitalstones are, how to get them and what you can do with them. Let's get started. What...