Taedal’s Tower 3rd Floor: Screams and a Healing Song

In this guide we tell you everything you need to know to complete the 3rd floor of the Secret Dungeon Taedal’s Tower: Screams and a Healing Song. Defeat the boss Starving Giant Zombie to continue to the next floor.

To access the 3d floor of Taedal’s Tower you must first complete the 2nd floor: Rushing Queen Spider, check out this guide for more details.

Still not sure what Taedal’s Tower is all about or how to get in? Don’t worry, find out everything you need to know about the Taedal Tower at this link: What is and How to Enter Taedal’s Tower Dungeon

Taedal’s Tower 3rd Floor: Screams and a Healing Song

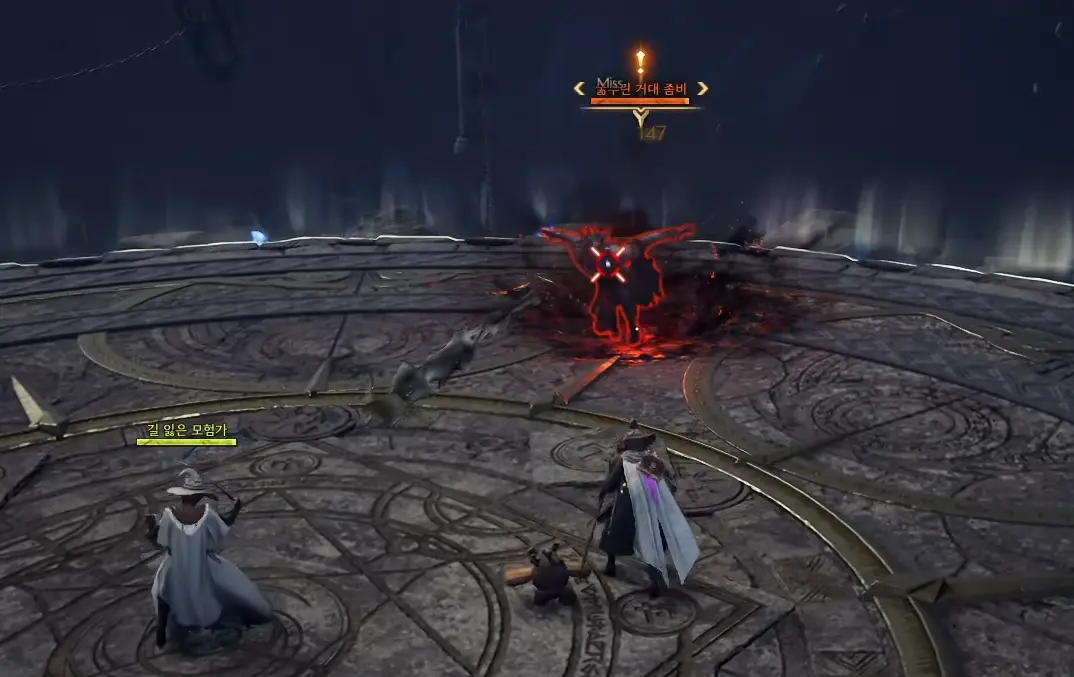
Once you enter the third level of Taedal’s Tower you will notice a difference, you are not alone. This time you won’t face the floor on your own, you will be helped by the NPC Lost Adventurer.

Before the Boss appear, you need to kill 4 Starving Zombies, it shoud be easy since they are slow and only attack in close range. Try to keep your distance usinmg long range attacks and kill them.

Starving Giant Zombie Strategy

Projectile

Starving Giant Zombie will not move, all it’s attacks are long ranged. The boss throws a projectile causing damage and dot damage.

Smash

Hit the ground with both hands and cause forward damage, avoid standing in front of the boss to escape the blow.

I’ll protect you!

When Lost Adventurer shouts “Come behind me! I’ll protect you!” take cover behind him and you will avoid being hit by the multiple projectiles that the Boss will throw.

Towards the end of the fight the boss will summon a new Starving Zombie. Be alert and kill it.

Rewards

  • Quality Weapon Growthstone x2
  • Quality Armor Growthstone x4
  • Quality Accessory Growthstone x3
  • Recovery Crystal x5
  • 4061 Coins
  • 5959 EXP

Community

InteractiveMap.App

Throne and Liberty Interactive Map

Dungeons

Throne and Liberty: Molgras and Murdock Dungeon

This guide will walk you through one of the first solo dungeons, also known as Halls of Illusion. These dungeons offer unique bosses and...
Dungeons

Throne and Liberty: Chapel of Madness Dungeon Guide

Overview of Chapel of Madness Chapel of Madness is a 3-Star Dimensional Circle Dungeon in Throne and Liberty (TL). Players must battle Grayeye, a powerful...
Dungeons

Throne and Liberty: Complete Guide to Limuny Bercant & Halls of...

Limuny Bercant Overview Limuny Bercant is a powerful undead boss in Throne and Liberty (TL), found within the Halls of Tragedy Dungeon. She possesses deadly...
Dungeons

Throne and Liberty – Rancorwood Dungeon Guide: How to Defeat King...

Rancorwood is a 3-Star Dimensional Circle dungeon in Throne and Liberty (TL) where players must face King Khanzaizin. This guide provides an overview of...
Throne and Liberty: Rune Synergy Bonuses
Guides

Throne and Liberty: Rune Synergy Bonuses

Weapon Rune Synergy Bonuses RaritySynergy BonusCommon- Strength 2- Dexterity 2- Wisdom 2- Perception 2- Bonus Damage 6- Damage Reduction 6Uncommon- Strength 2- Critical Hit Damage...
Throne and Liberty: How to get Bait
Guides

Throne and Liberty: How to get Bait

To fish in Throne and Liberty you will need bait. In this guide we tell you what it is for and how to get...
Throne and Liberty: Fortitude Stat
Guides

Throne and Liberty: Fortitude Stat

What is Fortitude? Fortitude stat aims to improve your survivability, boost your endurance, your base damage and enhances your crowd control resistance. Let's take...
Throne and Liberty: How to get Vitalstones
Guides

Throne and Liberty: How to get Vitalstones

In this short guide we tell you what Vitalstones are, how to get them and what you can do with them. Let's get started. What...