Master the purple beam mechanics and overcome Shakarux in the Voidwastes dungeon of Throne and Liberty (TL). This guide covers everything you need to succeed, including a complete Voidwastes walkthrough, strategies to beat Shakarux, and details about the rewards and drops.
Overview of Voidwastes
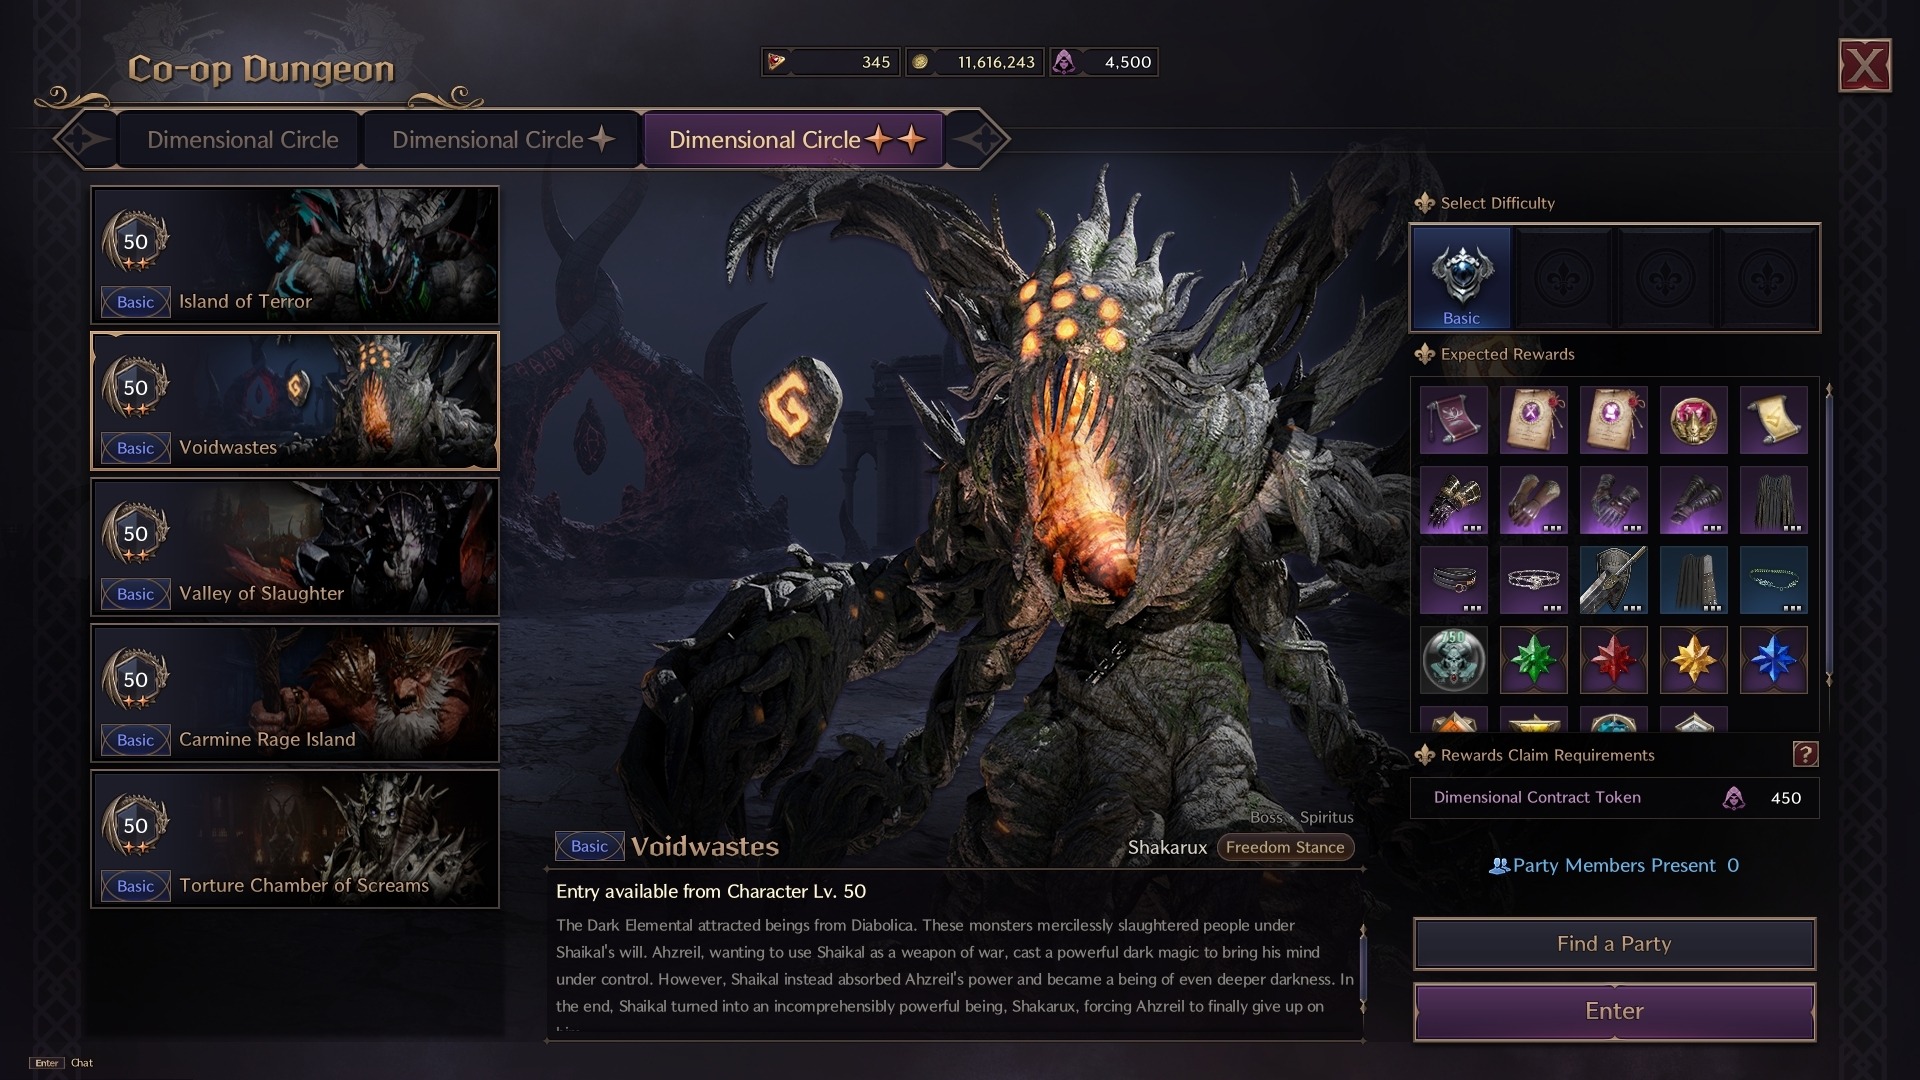
Voidwastes is one of the most challenging dungeons in Throne and Liberty, requiring players to manage unique mechanics, such as purple beams and glowing floors. It features three main bosses: Blatras, Belkros, and Shakarux, each with distinct abilities.
How to Beat Shakarux
Shakarux Overview
- Type: Undead
- Passive Ability: Freedom Stance – Increased Bind Resistance
Shakarux is the final boss of Voidwastes. Defeating this undead enemy requires precise teamwork and mastery of the fight’s unique mechanics.
Shakarux Mechanics
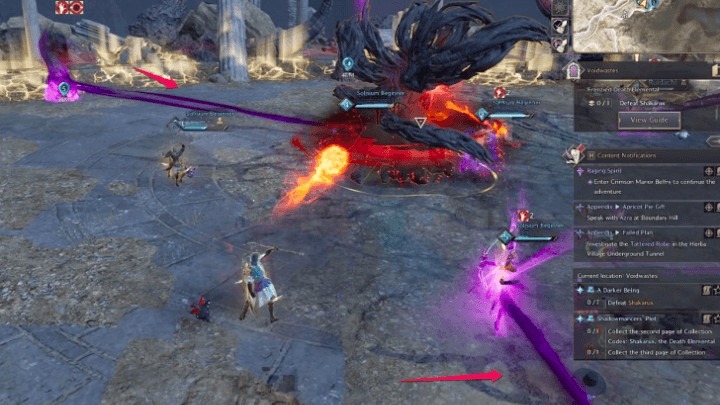
Purple Beams
- Mechanic Details:
- Three columns emit purple beams that apply stacking debuffs to players or Shakarux if hit.
- At 30 stacks, the affected target (player or boss) will either die or trigger a party wipe.
- Strategy:
- Split your party into three teams of two.
- Alternate intercepting the beams to manage stack buildup.
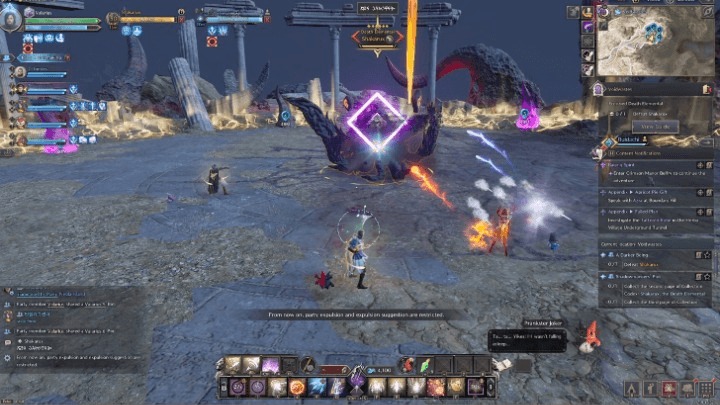
Yellow Haze
- Mechanic Details:
- Shakarux telegraphs this Fury attack with a diamond icon.
- Can occur twice in quick succession.
- Strategy:
- Use a block skill combined with a directional input to dodge effectively.
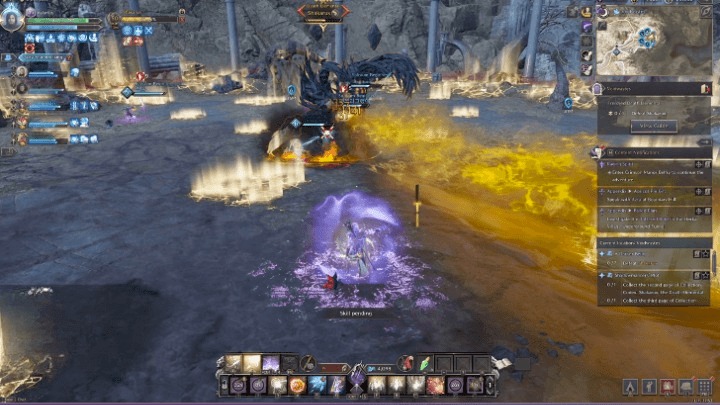
Yellow Breath
- Mechanic Details:
- Triggers when the purple beams stop. The arena shifts, and glowing floor sections appear.
- A marked player is targeted with a yellow breath attack.
- Three columns glow yellow, and the breath must hit all three to proceed.
- Strategy:
- The marked player should run clockwise or counterclockwise to align the breath with the yellow columns.
Red Sinkholes
- Mechanic Details:
- Two players are marked with red orbs, creating sinkholes that slow and damage anyone inside.
- Strategy:
- Marked players must move away from the group to prevent collateral damage.
Yellow Eyes
- Mechanic Details:
- At 50% and 30% health, Shakarux summons yellow-eye markers that deal unavoidable damage.
- Strategy:
- The healer should cast Blessed Barrier with expanded targets to mitigate damage.
- Tanks can use DaVinci’s Courage for additional protection.
Voidwastes Walkthrough
Clearing the First Area
- Objective: Eliminate all enemies while avoiding glowing floor tiles that deal damage and cause stuns.
- Tip: Stick to the safe zones and coordinate with your party to clear enemies efficiently.
Defeating Blatras
Mechanics
- Blatras performs multiple AoE attacks, which are easy to avoid with proper positioning.
- At 50% health, Blatras pulls all players in, disappearing and leaving glowing floor tiles.
Strategy
- Navigate out of the glowing tiles to avoid being stunned and taking fatal damage.
- Once the attack ends, Blatras will reappear, and the fight resumes as normal.
Defeating Belkros
Mechanics
- Belkros combines melee and ranged attacks, along with Fury attacks that can be blocked.
- At 50% health, Belkros pulls all players into a square arena with glowing floor edges.
Strategy
- Interact with glowing orbs to deactivate the floor tiles and safely exit the arena.
- Continue attacking once the glowing floor disappears.
Best Equipment and Roles
- Tank: Focus on survivability and skills like DaVinci’s Courage to mitigate damage.
- Healer: Prioritize AoE healing and Blessed Barrier for party-wide protection.
- DPS: Use ranged abilities to maintain high damage output while avoiding mechanics.
Rewards and Drops
Completing Voidwastes and defeating Shakarux grants:
- Rare crafting materials
- High-level equipment
- Unique cosmetics


