Throne and Liberty Conquest Battles are a PVP content for guilds. Conquest Battles are large scale combats, smaller than castle sieges, and guilds can gain significant benefits from them. During the Battle of Conquest, guilds will fight for possession of Riftstones and Boonstones, flags that symbolize control over certain areas. The winning guild will receive different benefits depending on the Boonstone or Riftstone captured.
Conquest Battle | Throne and Liberty
To participate in the Conquest Battle you must belong to a guild of at least Level 2 for Boonstones and Level 5 for Riftstones, and the Leader, Advisors or Guardians must register the guild for the attack. You can also participate individually in combat without belonging to the guilds registered to fight, but you will not obtain any benefit. Each guild can capture up to 3 Boonstones and 3 Riftstones, depending on their guild level.
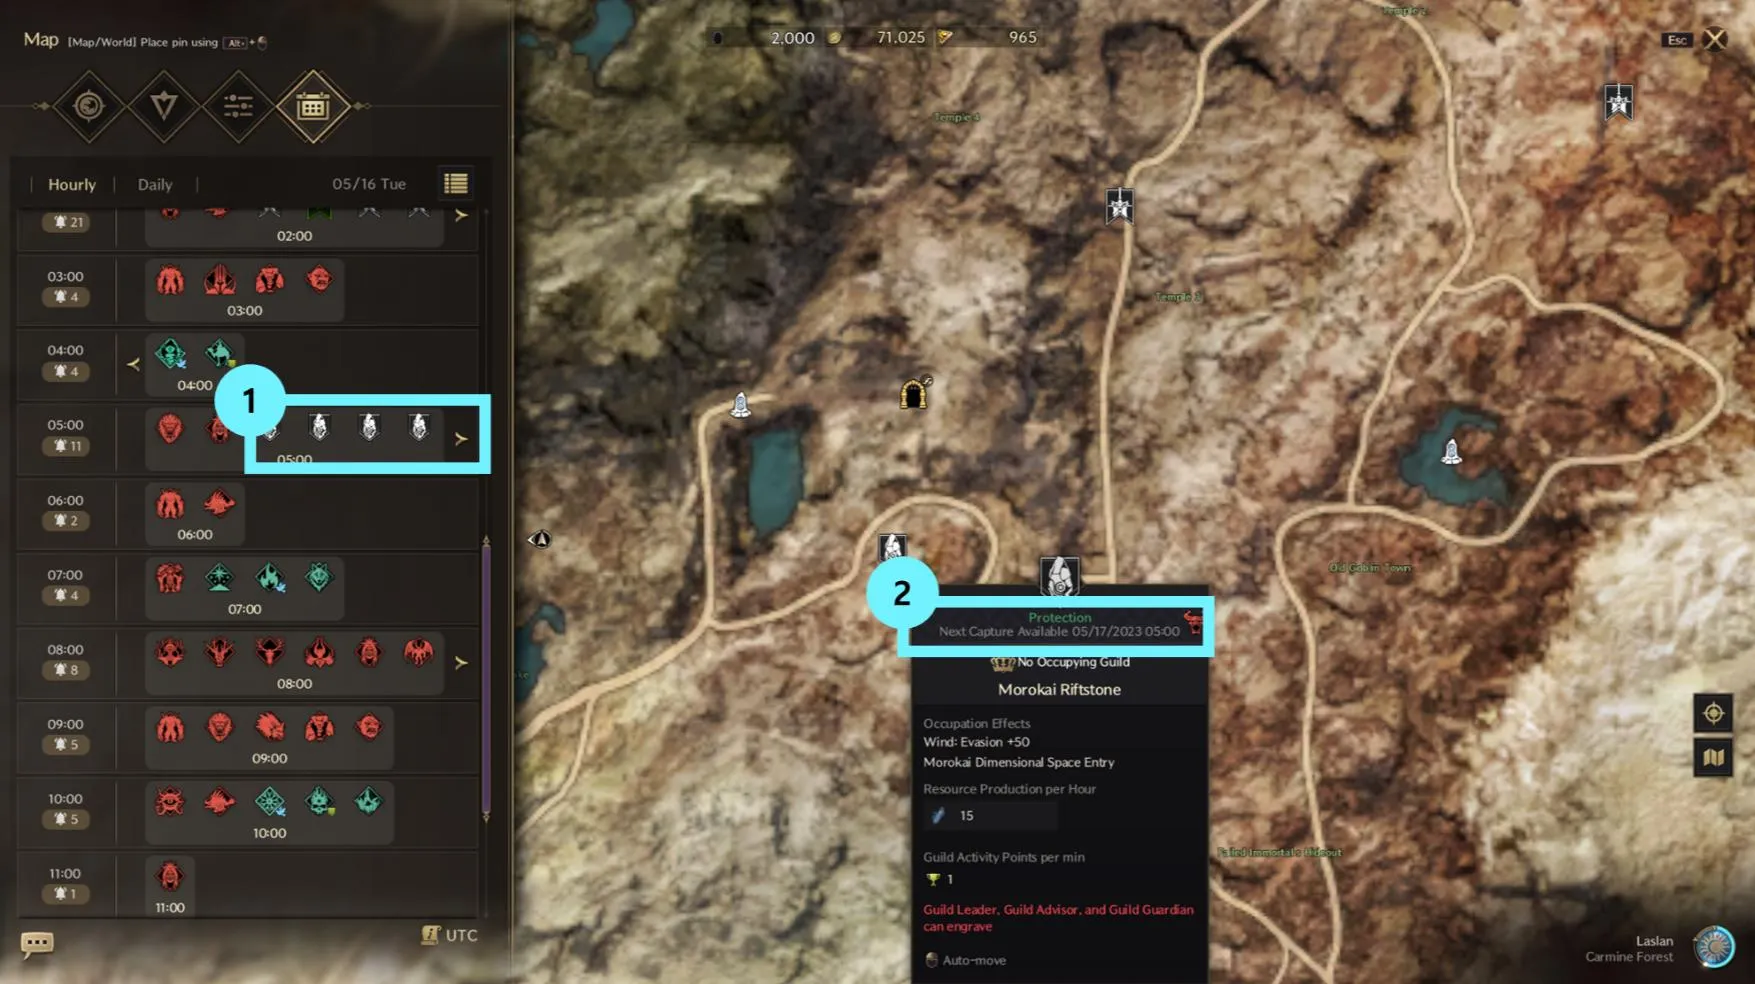
You can see on the Timetable the list of Boonstones and Ritfstones and when they will be available for assault. Sign up your guild to attack the Boonstone or Riftstone of your choice when it becomes available, and try alongside your allies to hold it until the battle is over. The winning guild will receive the benefits for one and a half days, and after 36 hours the Boonstone or Riftstone can be captured again. The guild that owns it can participate in the battle as a defender.
Conquest Battle: Combat | Throne and Liberty
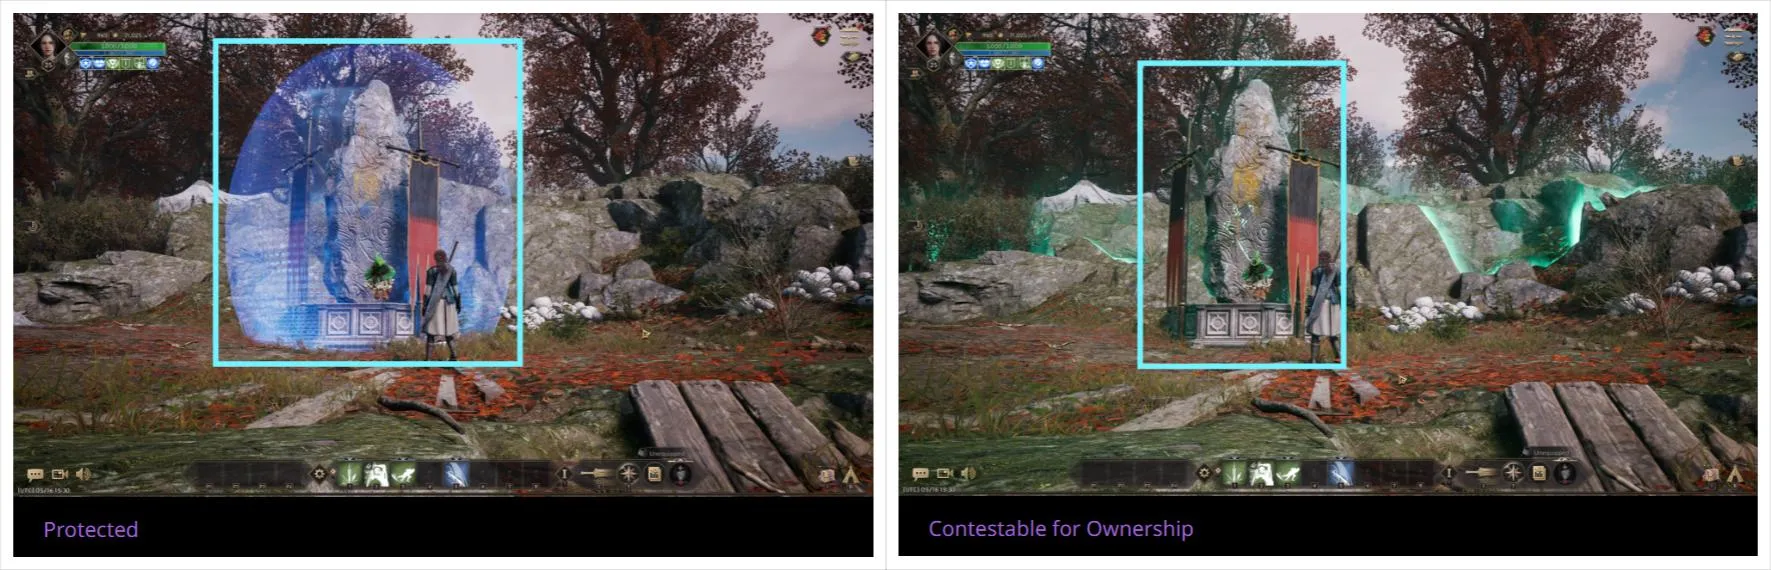
To claim possession of the Riftstone or Boonstone, the Guild Leader, Advisor or Guardian must have a Guild Flag, which can be purchase at the Guild Supplies Shop. Once the battle begins, any guild can attempt to take possession of the Riftstone or Boonstone since it becomes unprotected.
Conquest Battle: Boonstone
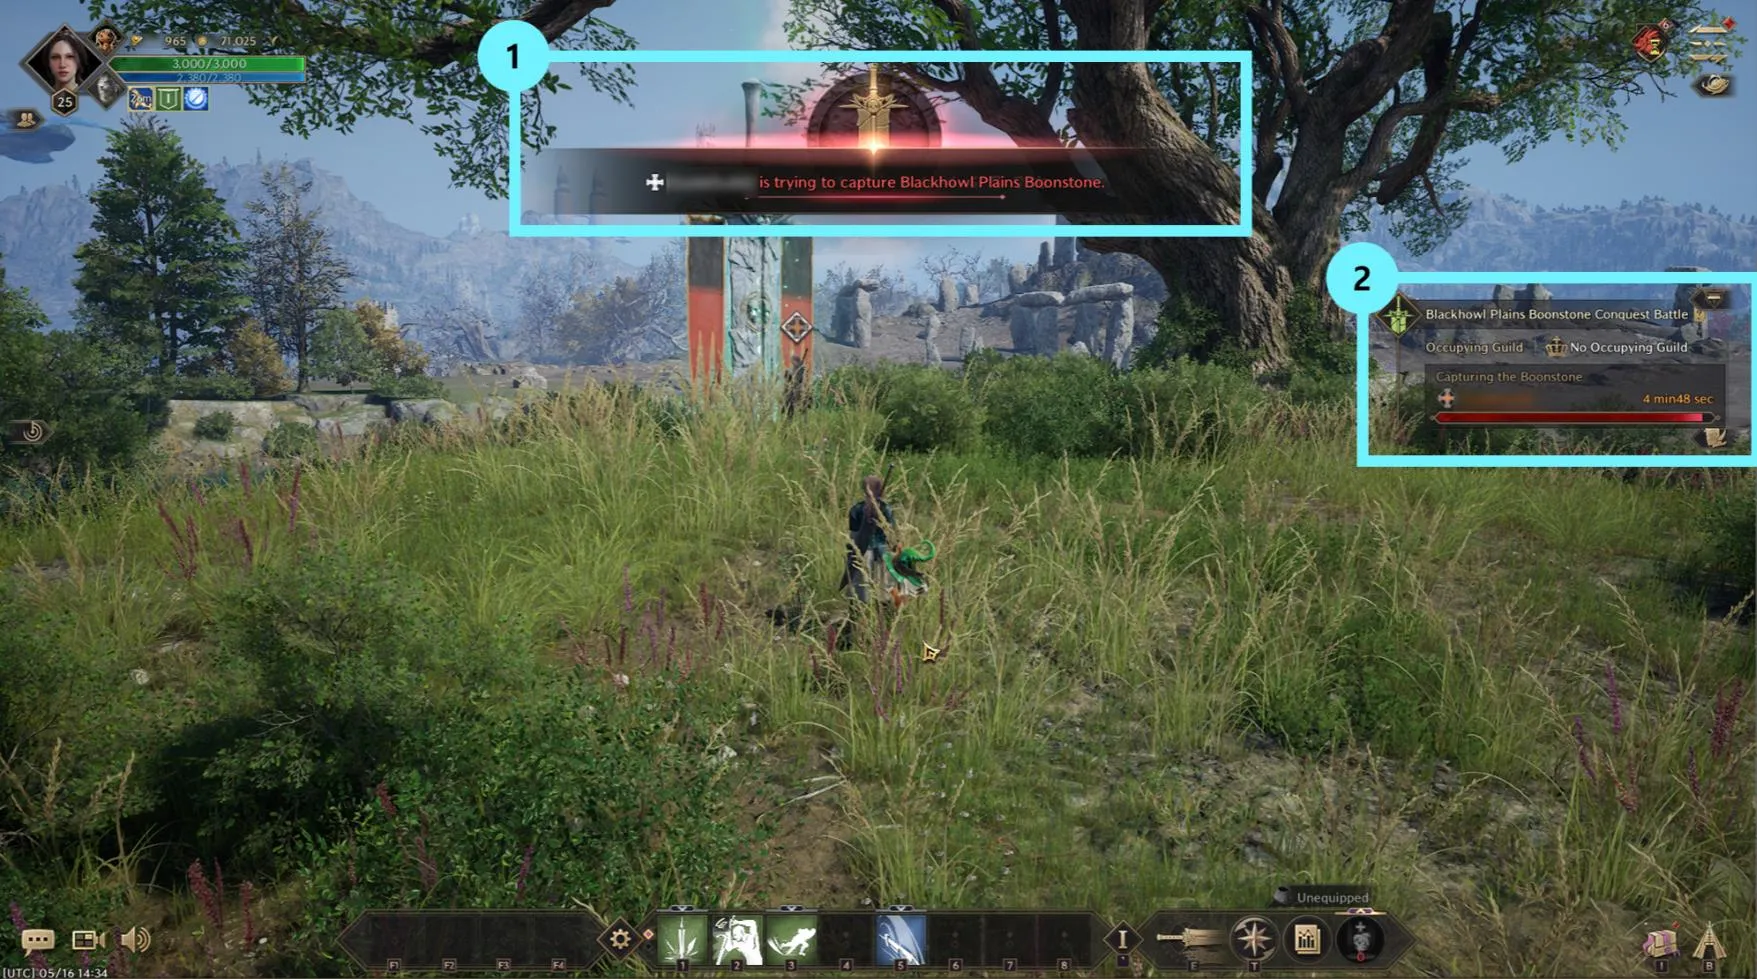
To capture Boonstone, the guild leader, advisor or guardian must activate the capture with the guild flag and defend the area around the flag for 5 minutes. The battle will last 30 minutos, and the guild that has control of the flag when the time is over will be the winner and owner of the Boonstone.
Learn more about Boonstone in the following link.
Throne and Liberty: Boonstone
Conquest Battle: Riftstone
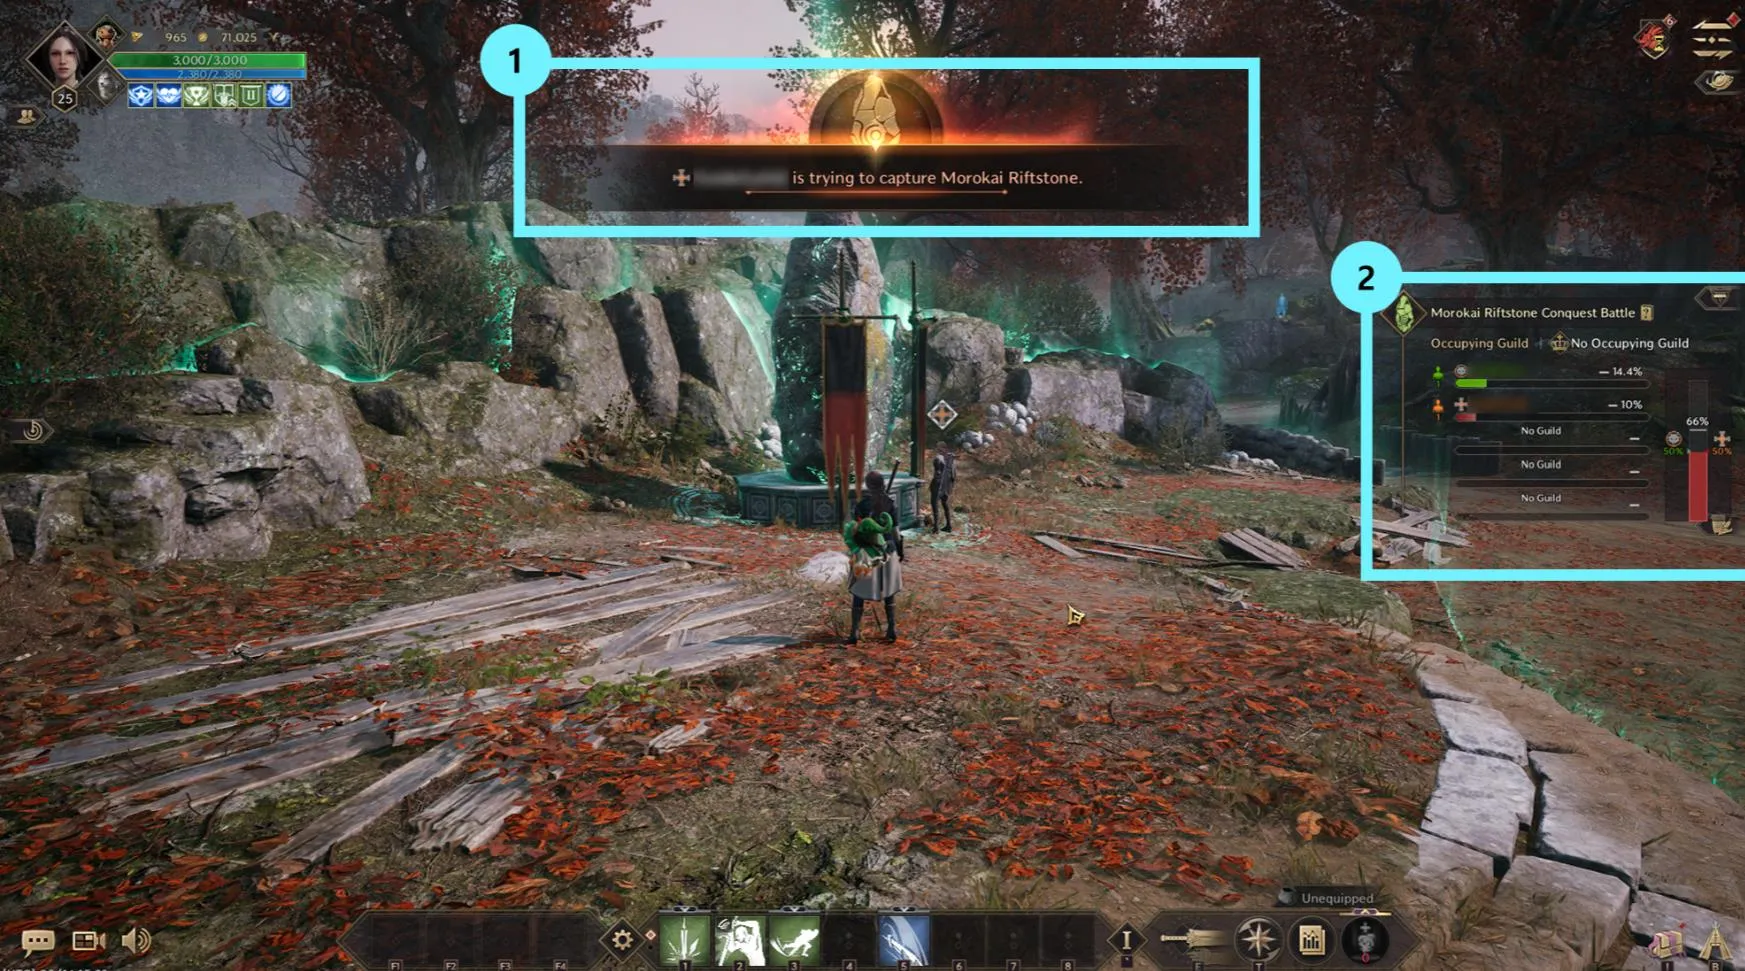
A Riftstone becomes Captured when a Capturing Guild takes possession and multiple guilds can participate at the same time. To claim victory, a guild must reach 100% of the Capture gauge first.
The Capture gauge rises for the guild with the most surviving members in the Capture Zone, and decreases for the others. If a guild gauge reaches 0%, they will be eliminated. If a guild has more than 66% of its members in the Capture Zone, the gauge rises faster for the first-place guild, and falls faster for the others.
If no guild has reached 100% of the Capture gauge by the end of the time limit (30 minutes), ownership will not change, and the Conquest Battle will end.
Learn more about Riftstones in the following link.
Throne and Liberty: Riftstone
Conquest Battle: Rewards | Throne and Liberty
Both Boonstones and Riftstones will give exclusive benefits to the guild that wins the siege.
Boonstone Benefits
Each Boonstone grants a buff that increases the Occupying Guild members’ stats and it also gives Guild Activity Points and Guild resources proportional to the amount of time they own it.
Riftstone Benefits
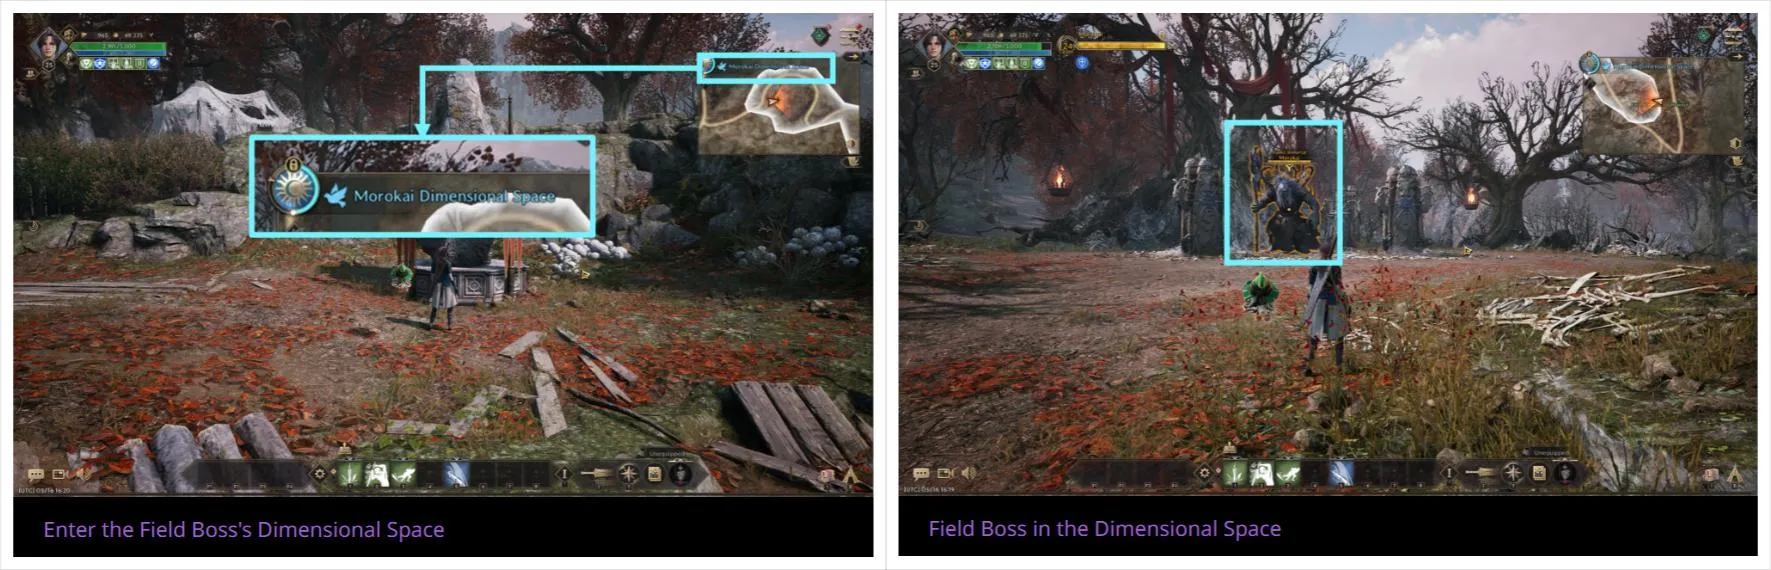
Each Riftstone grants a buff that increases the Occupying Guild members’ stats. It also gives them Guild Activity Points and Guild resources proportional to the amount of time they own it. The occupying guild will be granted access to the Riftstone Dimensional Space.
The Dimensional Space is where the Field Boss resides. The Occupying Guild can fight the Field Boss, separately from the Field Boss Event, to earn various rewards. Field Bosses in Dimensional Spaces have the exact same abilities and rewards as Field Bosses outside.
Field Bosses in Dimensional Spaces reappear every day at midnight.


