Limuny Bercant Overview
Limuny Bercant is a powerful undead boss in Throne and Liberty (TL), found within the Halls of Tragedy Dungeon. She possesses deadly mechanics that require precise teamwork and strategic positioning.
Limuny Bercant Passive Ability
- Deathly Mind’s Eye (Night Mode): Increases accuracy during nighttime battles.
Limuny Bercant Mechanics & Attack Patterns
Thorns AOE
- Players marked with a green circle will explode after a delay, leaving an area of effect (AOE) damage-over-time (DOT).
- Strategy: Marked players must isolate themselves from the group and escape the area before detonation.
Stone Transformation
- A red circle marks a player before Limuny Bercant lets out a crowd control (CC) scream that affects the entire party.
- Strategy: Players must stack together inside the red circle to survive.
- Phase 2 (Below 50% HP): The circle turns purple, but the mechanic remains unchanged.
Limuny Bercant Attack Rotation
Limuny Bercant follows a repeating pattern:
- Normal Attack
- Fury Attack / Wrath Attack
- AOE Attack
Fury Attack
- A wide-cone attack aimed at the tank.
- Dodge Strategy: Move in any direction and use defensive skills.
- DPS Tip: Position behind Limuny Bercant to avoid damage.
Wrath Attack
- A circular AOE attack around Limuny Bercant.
- Block Strategy: Use defensive abilities to mitigate damage.
Best Team Composition & Roles for Halls of Tragedy
Tank (Greatsword / Sword & Shield)
- Dungeon Role: Crowd control, pulling aggro, stunning minibosses.
- Boss Fight Role:
- Maintain aggro away from teammates.
- Position opposite of DPS players when taunting.
DPS (Dagger / Crossbow)
- Dungeon Role: Primary damage dealers.
- Boss Fight Role:
- Stay positioned away from the tank to avoid AOE damage.
- Maximize DPS during boss openings.
Healer (Wand / Staff)
- Dungeon Role: Sustain the team with heals and buffs.
- Boss Fight Role:
- Prioritize healing the tank.
- Watch for burst damage phases.
Halls of Tragedy Dungeon Walkthrough
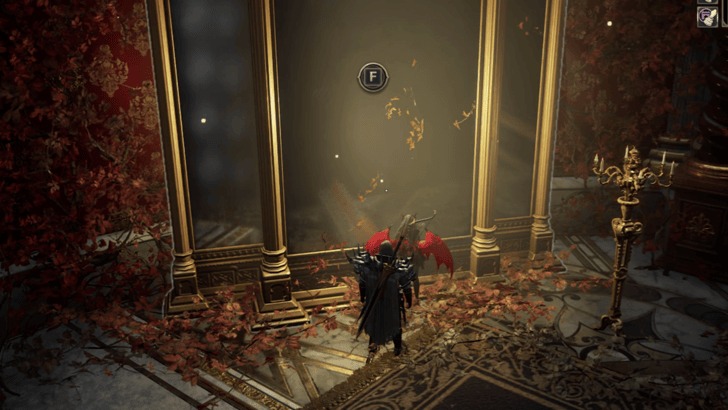
1. Activate the Mirror & Clear Mobs
- Enter the dungeon and interact with the left mirror.
- Eliminate orange-marked mobs to unlock the next area.
2. Tree Knight Boss Fight
- Defeat Tree Knight and use the mirror to return to the entrance.
- How to Defeat Tree Knight:
- Tank pulls aggro while DPS positions behind.
- Interrupt its pull attack using stun abilities.

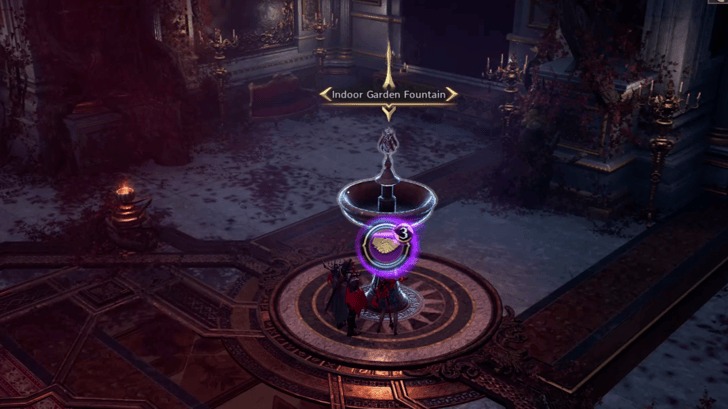
3. Navigate the Maze & Activate Fountains
- Interact with the right mirror.
- Split into two groups to activate fountains simultaneously.
- Avoid red plants that explode on proximity.
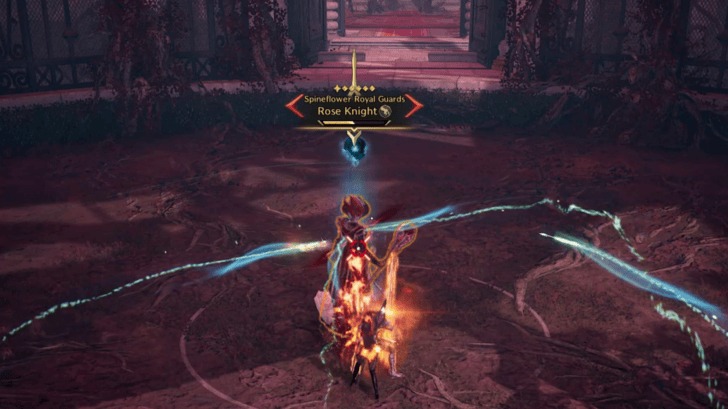
4. Rose Knight Boss Fight
- After defeating Rose Knight, the final middle mirror becomes accessible.
- How to Defeat Rose Knight:
- Avoid spawned flowers that deal DOT damage.
- Prepare for unavoidable sleep mechanic—use cleanse or burst heal.
Halls of Tragedy Dungeon Requirements & Rewards
Entry Requirements
- Level Requirement: 55
- Difficulty: 3-Star Dimensional Circle
- Minimum Combat Power: 3,500
Best Drops & Loot
Armor: Transcendent Tempest’s Touch
- Type: Hands Armor (Wing Gale Set)
- Stats:
- Melee Defense: 210
- Ranged Defense: 210
- +2% Attack Speed
- +3 Dexterity
- +2 Wisdom
- Best For: Dexterity and Wisdom-based builds.
Accessory: Death Knell Gorget
- Type: Necklace
- Stats:
- Magic Defense: 240
- +4% Attack Speed
- +1 Dexterity
- +50 Ranged Evasion
- +90 Magic Evasion
- Best For: High Dexterity and evasion-focused characters.
Final Tips for Beating Limuny Bercant
- Tank’s Priority: Keep aggro and position away from DPS.
- DPS Strategy: Stay behind Limuny Bercant for safe damage output.
- Healers’ Role: Watch out for tank damage spikes and keep the group alive.
- Team Coordination: Communicate before Thorns AOE & Stone Transformation phases.


