Welcome to the Chernobog Guild Boss Guide for Throne and Liberty. Among the various Raid Bosses found in the open world and Guild Raid activities, Chernobog stands out as a Level 34 Boss, presenting unique challenges for players.
We recommend tackling Chernobog with guildmates who exceed Level 34 for the best chance of success. Let’s explore the mechanics and strategies required to defeat this boss!

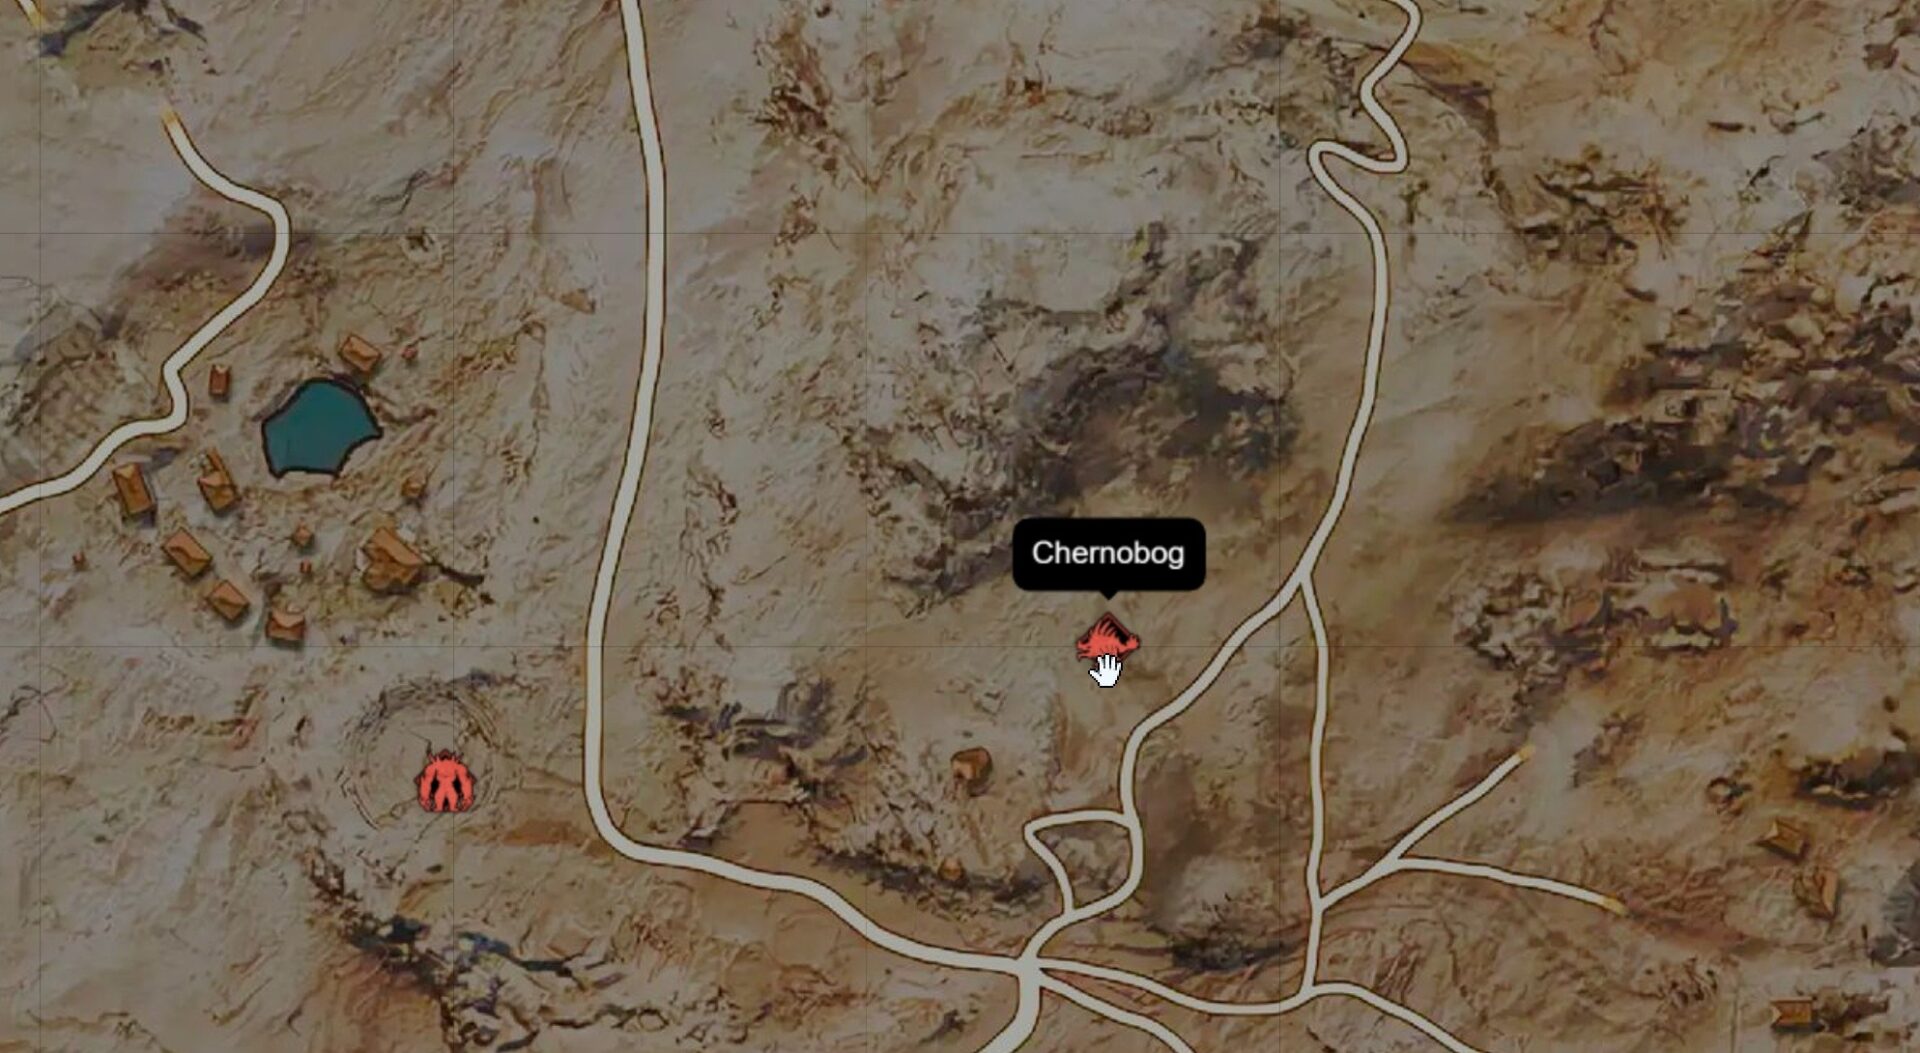
Location
Chernobog is located in the Abandoned Stonemason Town.
- To reach this boss, teleport to the Abandoned Stonemason Town Waypoint and travel directly north.
- Guilds can also challenge Chernobog in the Guild Hall upon reaching Guild Level 12.
Chernobog Location Interactive Map
Chernobog Boss Fight
Phase 1
During the first phase, Chernobog employs a mix of poisonous melee attacks and burrowing mechanics:
- Poison Melee Attacks:
These basic attacks inflict a poison debuff, causing damage over time (DoT). While non-lethal, healing or Nature’s Blessing makes these attacks manageable. - Burrow and Resurface:
Chernobog burrows underground and resurfaces at a random player’s location, dealing damage, knocking them up, and staggering them.
Tip: Stay mobile to avoid the knock-up effect. - Tail Thrash Fury Attack:
The boss occasionally thrashes its tail in a large AoE attack.- Watch for the Fury Attack Indicator (it appears white if out of range).
- Avoid standing directly behind Chernobog to minimize damage.
Phase 2
In the second phase, Chernobog escalates its burrowing mechanics and introduces new challenges:
- Repeated Burrow and Resurface:
Chernobog burrows multiple times, resurfacing at various locations. Each resurface deals damage with an added poison stack. - Final Resurface:
Chernobog leaps high into the air, pulling nearby players along.- Tip: Morph into Glide form to avoid fall damage when descending.
- Petrifying Gas Attack:
At the end of the phase, Chernobog sprays a cone-shaped gas attack in front of it, which petrifies players caught within the area of effect.- Petrified players are immobilized and vulnerable to follow-up attacks. Avoid standing in front of Chernobog during this move.
After completing this sequence, the fight resets to the beginning, and players must repeat the above mechanics until Chernobog is defeated.
Key Mechanics
1. Fury Attack – Tail Swipe:
- Chernobog winds up for a Tail Swipe AoE, stunning and pushing back players behind it.
- Warning Cue: The boss says an unintelligible phrase before attacking.
- Tip: The Purple Fury Indicator is slow, making it easy to time a Block and avoid the effect.
2. General Attack Patterns:
- Spawn AoE Attack:
When Chernobog spawns, it ascends from the ground, dealing AoE damage and knocking nearby players up.- Tip: Maintain a 10-meter distance from the spawn location to avoid getting launched.
- Poisonous Basic Attacks:
These attacks deal manageable DoT damage but require a healer to mitigate prolonged effects. - Burrow and Resurface Mechanics:
- Chernobog burrows randomly, reappearing to stun and knock back players.
- After the first resurface, it burrows again and knocks up surrounding players upon its second ascent.
Tips for Success
- Team Coordination:
Ensure your team has sufficient healing and mobility to counter poison stacks and avoid burrowing attacks. - Positioning:
- Avoid standing directly behind Chernobog to minimize damage from its Tail Thrash Fury Attack.
- Stay clear of the spawn location during its AoE Knock-up.
- Morph into Glide Form:
During the Final Resurface, use Glide form to prevent fall damage after being launched into the air. - Avoid Petrifying Gas:
Stay out of the cone-shaped gas attack during Phase 2 to avoid being turned into stone.
Rewards and Loot from Chernobog
Chernobog’s Blade of Beheading
Helm of the Field General
Arcane Shadow Shoes
Bile Drenched Veil
Daggers of the Resistance
Longbow of the Resistance
Viperstrike Arbalests
Wand of Skyward Blessing
Decorated Champion Crown
Soul Mirror Hand Guards
Ghost Skoll


