Welcome to the Talus Guild Boss Guide for Throne & Liberty. This guide provides a detailed breakdown of the mechanics, attacks, and strategies needed to defeat Talus, a powerful boss who presents unique challenges for both open-world and guild encounters.

List of Contents
Talus Boss Overview
Location: How to find Talus
Talus Boss Mechanics and Attack Guide
Rewards and Loot from Talus
Talus Boss Overview
Talus is a Level 42 boss in Throne & Liberty, known for his wide-ranging AOE attacks and punishing melee moves. Coordination and quick reactions are essential, especially for handling his group-wide mechanics. You can encounter Talus in two ways:
- Open World: Talus can be found in the Raging Wilds. Start from The Raging Wilds Waypoint and head directly west to reach him.
- Guild Hall: Guilds that have reached level 15 or higher can summon Talus in the Guild Hall for a controlled and private encounter.
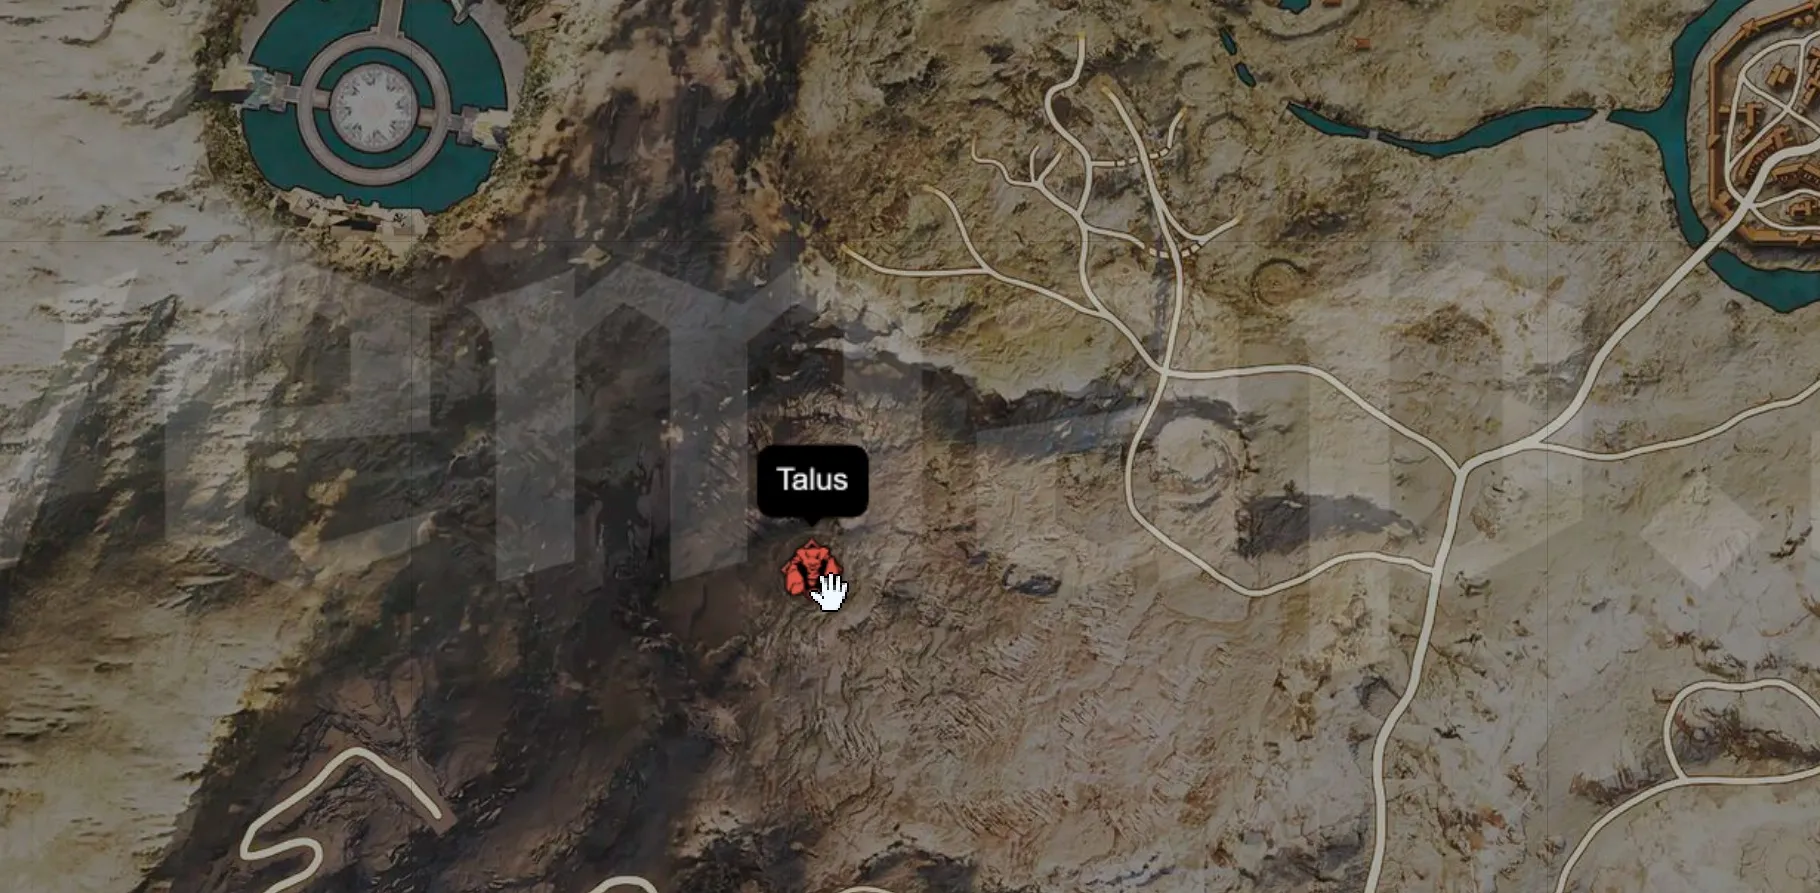
Location: How to find Talus
Talus is easily accessible by traveling directly west of The Raging Wilds Waypoint. He spawns in a crater surrounded by cliffs, with elevated ledges that provide a positional advantage for ranged DPS, particularly helpful for PvP encounters.
Talus Interactive Map Location – Here
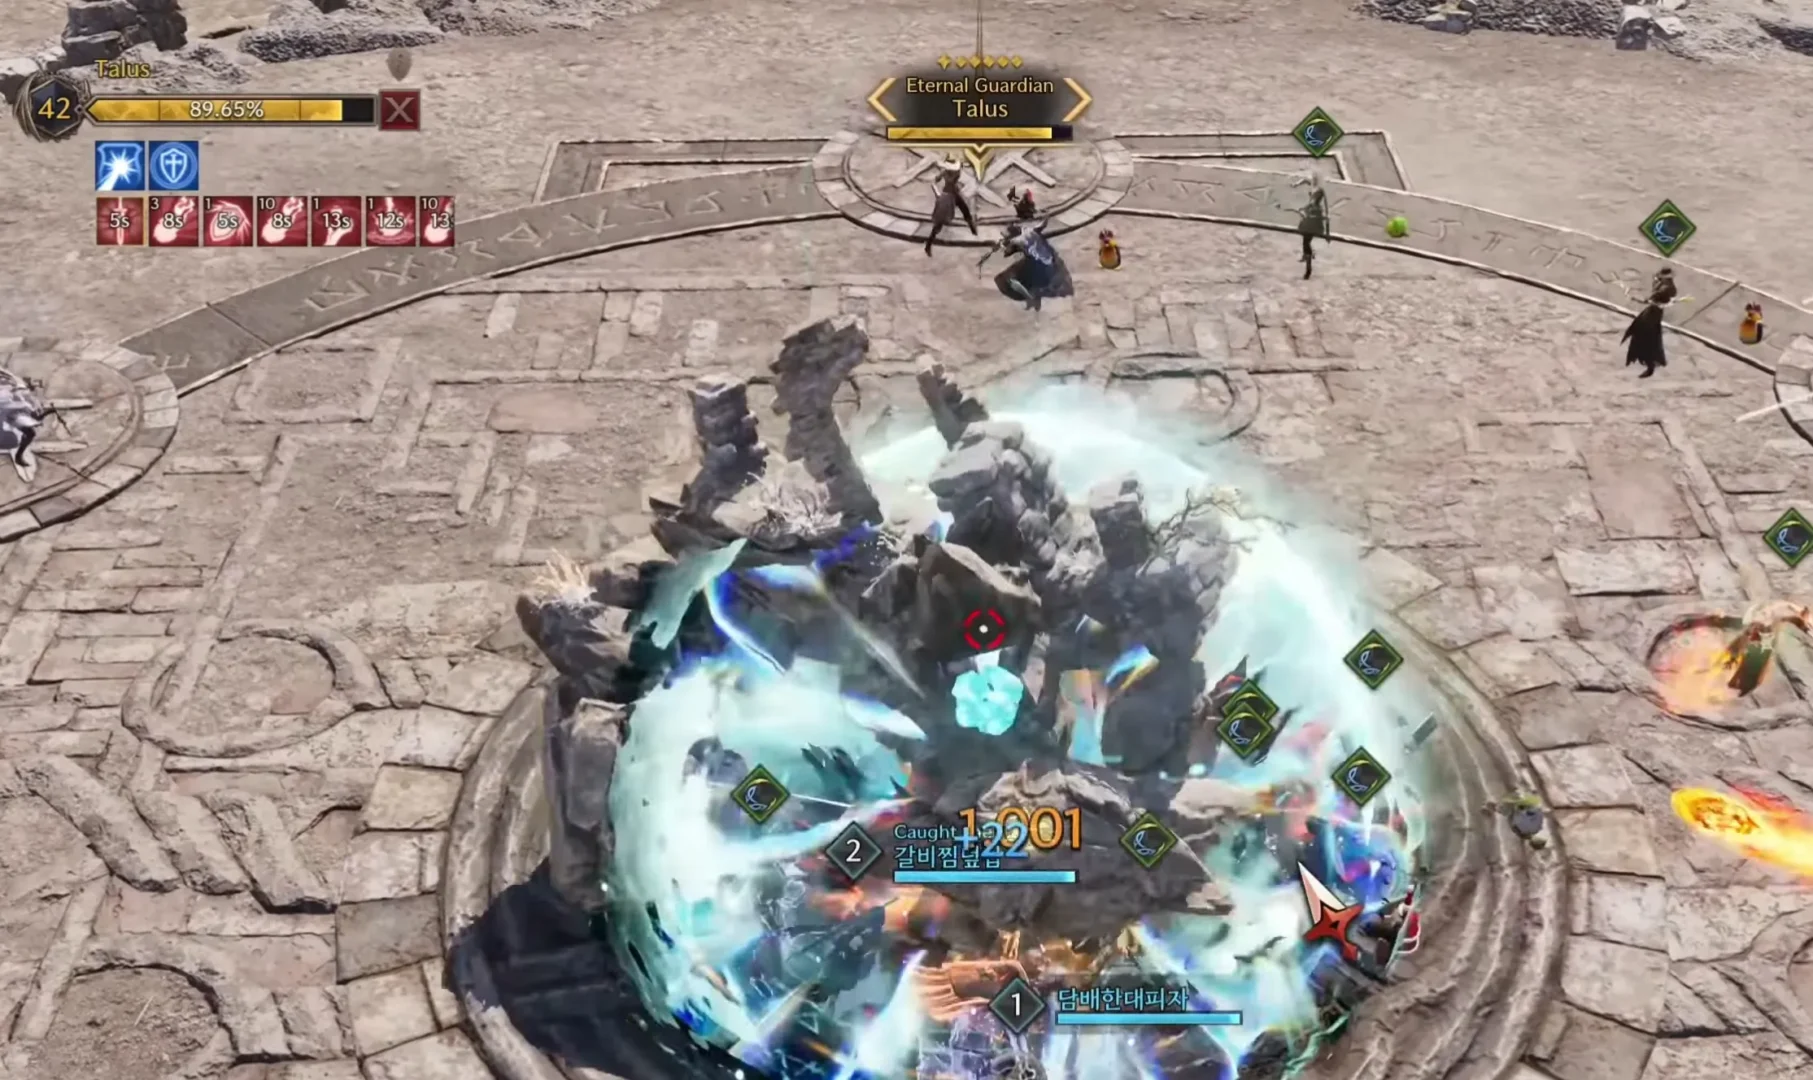
Talus Boss Mechanics and Attack Guide
Here’s a complete overview of Talus’s attack patterns and the mechanics you’ll need to handle effectively to defeat him.
Standard Attacks
- Mechanic: Talus uses basic melee attacks on players within close range.
- Impact: These attacks are relatively straightforward but can add up if not managed properly.
- Strategy: Ensure tanks or melee DPS are positioned correctly to absorb these hits.
AOE Wave
- Mechanic: When no players are within melee range, Talus releases powerful shockwaves that deal damage and knock back all players in the area.
- Impact: This attack can disrupt positioning and create vulnerabilities, especially for ranged players.
- Strategy: Always keep at least a few players in melee range to prevent Talus from initiating this shockwave.
Fury Attack
- Mechanic: Talus performs a Fury Attack with a purple indicator signaling the strike.
- Impact: This attack inflicts significant damage, which can only be avoided with a well-timed block.
- Strategy: Watch for the purple indicator and be ready to block. Make sure the entire group coordinates to time their blocks effectively.
Spin Attack
- Mechanic: Talus spins his arms in a whirlwind motion, causing rocks to fly around the arena and deal heavy damage to anyone caught in the path.
- Impact: This move can decimate players who aren’t positioned carefully.
- Strategy: Position the raid close to Talus to avoid the spinning rocks or move to the arena’s edge if you’re willing to pause your attacks temporarily. Being close will allow continuous damage, but the outer edge can be a safe alternative.
Wipe Mechanic
- Mechanic: Talus spawns three totems around the arena. Players must interact with a totem to charge up a shield that protects them from an imminent AOE attack.
- Impact: Failing to use a totem results in instant death from the AOE.
- Strategy: Be prepared to quickly locate and activate a totem as soon as they spawn. Communicate within the team to ensure everyone is shielded before the AOE goes off.
Rewards and Loot from Talus
Guaranteed Loot
- Conquest Participation Award: Talus
Random Loot Drops
Talus’s Crystalline Staff
Phantom Wolf Mask
Blessed Templar Plate Mail
Forged Golden Bangle
Dead Reckoning Greatsword
Blade of the Resistance
Scepter of the Resistance
First Blood Longbow
Duskblood Mask
Resolute Crusader Gauntlets
Sprouting Talem


